
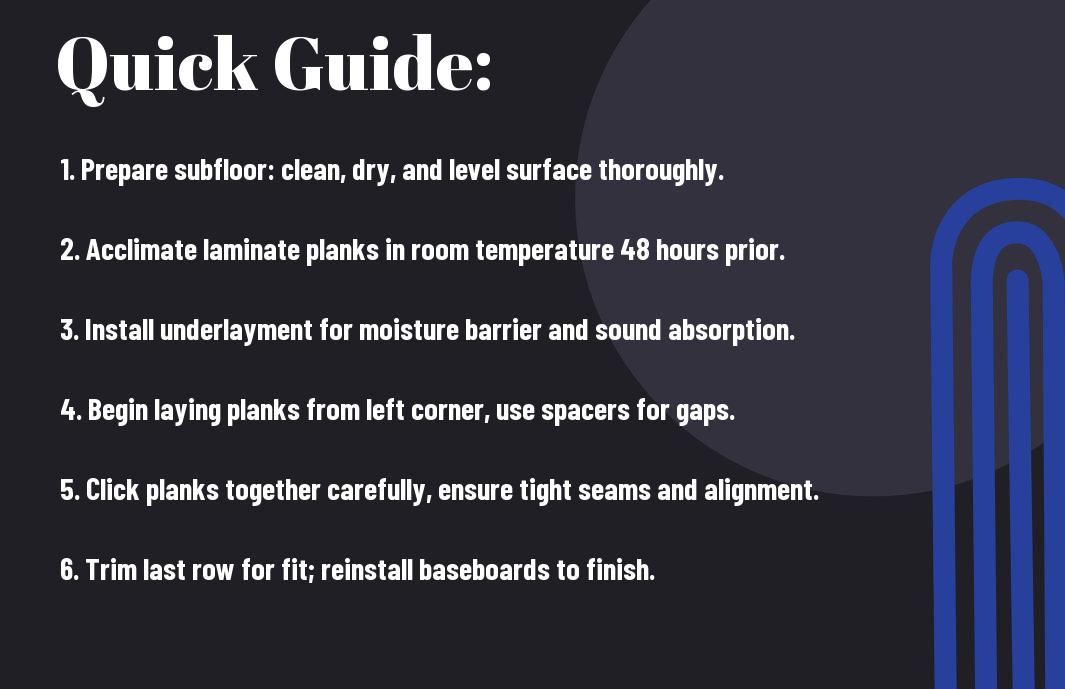
Flooring can transform your space, and laminate is a popular choice for its affordability and versatility. In this ultimate guide, you’ll discover necessary tips and tricks to help you achieve a flawless installation that enhances your home’s aesthetic. From choosing the right materials to mastering installation techniques, this guide will empower you to take on your laminate flooring project with confidence, ensuring a perfect finish that you can be proud of. Let’s examine the world of laminate flooring, and get started on your renovation journey!
Preparing for Success: Pre-Installation Essentials
Preparation sets the foundation for a smooth laminate flooring installation. Start by gathering your tools, ensuring your work area is clear, and addressing environmental factors like temperature and humidity. Understanding these elements will not only enhance your installation experience but also guarantee a flawless final look.
Evaluating Your Space: Floor Measurements and Conditions
Accurate measurements of your space are imperative before stepping into installation. Take precise dimensions of each room, noting any irregularities or obstacles like columns and doorways. Check the existing floor’s condition too; it should be clean, dry, and level to avoid future issues with your laminate flooring.
Choosing the Right Tools and Materials: A Strategic Approach
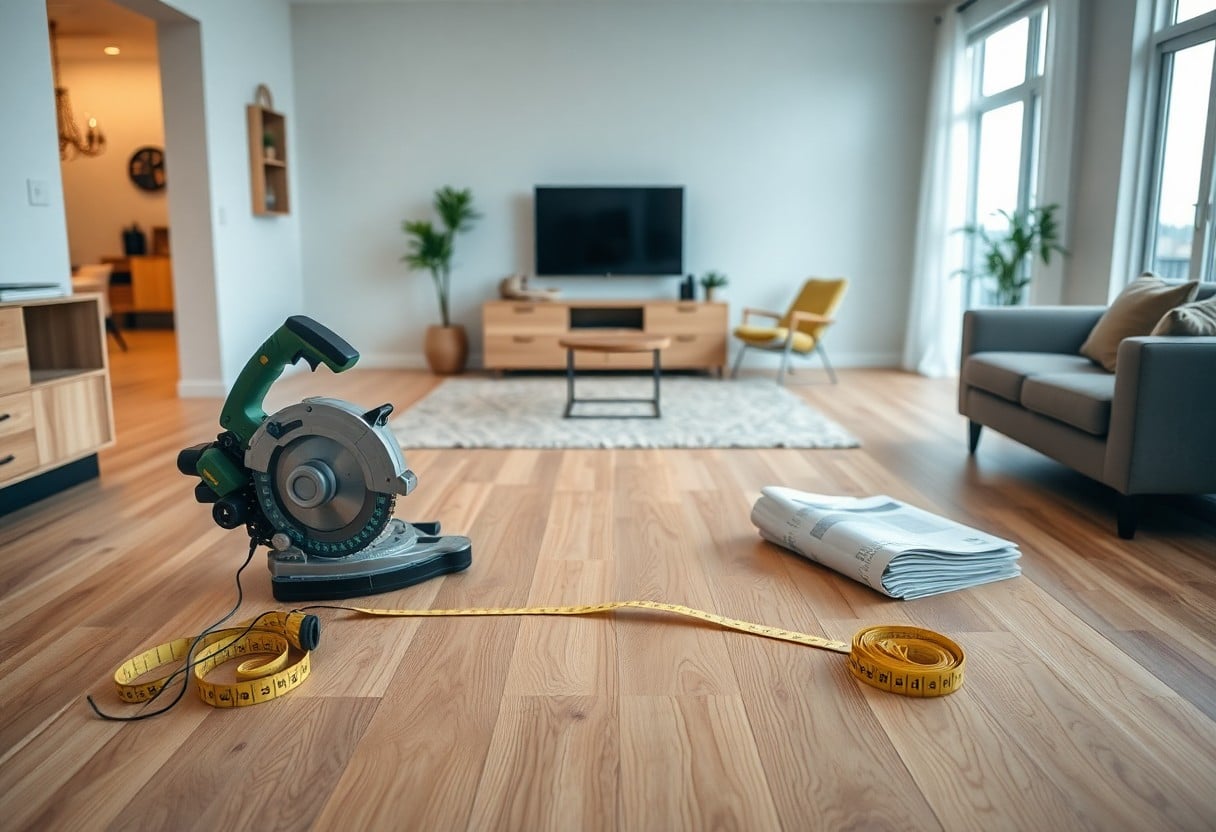
Effective tools and quality materials streamline the installation process and ensure durability. A list of imperatives includes a saw for cutting the planks, a tapping block, spacers for expansion gaps, and underlayment for added comfort and insulation. Selecting the right laminate and underlayment suited to your space’s specific needs will significantly impact the installation’s outcome.
A strategic approach to selecting tools and materials also involves investing in top-notch underlayment which can enhance soundproofing and provide extra cushioning. Choose laminate that meets your lifestyle demands, whether it’s scratch resistance for pets or moisture resistance for high humidity areas. Assess manufacturers’ specifications, as specific products may be better suited for particular conditions, ensuring your laminate flooring not only looks great but lasts longer.
Mastering the Techniques: Installation Steps Unraveled
Taking on laminate flooring installation may seem daunting, but breaking it down into manageable steps makes the process approachable. From preparing your subfloor to laying down the final pieces, understanding each phase ensures a successful and stunning finish. You’ll want to gather your tools and materials, familiarize yourself with the installation methods, and be patient as you progress through the stages. With careful planning and execution, you will transform your space beautifully.
Achieving Flawless Subfloor Preparation: Your Foundation for Success
A well-prepared subfloor sets the tone for your entire laminate flooring project. Before you begin installation, ensure your subfloor is clean, dry, and level. Use a leveling compound if necessary to address any imperfections, and check for moisture using a moisture meter to prevent future issues. If you’re covering an existing floor, such as carpet or linoleum, consider removing it for optimal results. Your attention to detail during this stage will directly influence the longevity and appearance of your new flooring.
The Art of Plank Placement: Patterns and Layouts that Impress
Choosing the right placement pattern is necessary for achieving a stunning visual effect in your space. Consider laying planks parallel to the longest wall or diagonal for added depth. Herringbone and chevron patterns can also lend a contemporary flair. Explore how the direction of natural light interacts with the flooring to highlight its beauty. Each option can dramatically alter the perception of space and style, allowing you to customize your flooring design to fit your unique taste.
When deciding on plank placement, it’s not just about aesthetics; functionality also plays a key role. Remember to stagger seams for increased structural integrity and visual appeal. A 6- to 8-inch offset is ideal for a balanced look, while the herringbone pattern can create a sophisticated air in open areas. For a seamless transition between rooms, consider the layout of adjoining spaces and how the patterns can flow harmoniously together. By marrying both function and style, you’re setting the stage for a flawless installation.
Seamless Finishing Touches: Trimming, Molding, and Transition Strips
The final moments of your laminate flooring installation involve adding trims, moldings, and transition strips, which are instrumental in tying the entire look together. Use quarter-rounds or baseboards to cover expansion gaps and create a polished edge where the flooring meets walls. Transition strips become necessary when shifting between different flooring types; they provide a finished look and address height variations between surfaces. Selecting the right materials and finishes ensures a cohesive design throughout your space.
Don’t overlook the influence of color and texture in your finishing touches. Opt for trims that complement your laminate’s hue or introduce a contrasting tone for a bold statement. Ensure that your transition strips are installed correctly to avoid tripping hazards and maintain smooth transitions between rooms. Your meticulous attention to these details enhances the overall appearance and functionality of your new flooring, providing a beautiful, durable finish that you can enjoy for years to come.
Avoiding Common Pitfalls: Pro Tips for Smooth Execution
Installation often presents unforeseen challenges that can affect your overall success. By following specific strategies, you can navigate these potential pitfalls and achieve impeccable results. Pay close attention to your layout plan, maintain consistency in expansion gaps, and ensure proper acclimation of the planks. Always double-check your cuts and seams to avoid misalignment and unsightly gaps.
- Double-check measurements before cutting.
- Maintain correct expansion gaps around the perimeter.
- Use spacers to ensure consistent spacing.
- Acclimate your laminate for at least 48 hours prior to installation.
- Thou shall take your time with each step for precision.
The Top Five Installation Mistakes and How to Sidestep Them
Overlooking proper acclimation is a common installation mistake. Without allowing your laminate to adjust to the room’s temperature and humidity, it could become warped after laying. Improper underlayment installation can cause uneven surfaces, leading to noise and discomfort when walking. Be mindful of your expansion gaps, as failing to adhere to them can create buckling. Additionally, neglecting to measure twice can result in wasted materials. Tackling your installation methodically and thoughtfully helps prevent these issues.
Adjusting for Environmental Factors: Temperature and Humidity Hacks
Temperature and humidity directly impact your laminate flooring’s performance. Keeping your home’s climate stable ensures the integrity of the material over time. Ideally, laminate flooring should be installed in spaces with temperatures between 60°F and 80°F. Humidity levels should be maintained between 30% and 50%. If you detect improper levels, invest in a dehumidifier or a humidifier to balance the environment before installation.
- Acclimate flooring in the installation area.
- Avoid overexposure to sunlight; use shades if needed.
- Keep an eye on seasonal changes affecting humidity.
- Utilize a hygrometer to monitor humidity levels.
- Thou shall ensure your space is climate-controlled before starting.
Environmental Adjustments for Laminate Flooring Success
| Factor | Adjustment Strategies |
|---|---|
| Temperature | Maintain within 60°F – 80°F range for installation. |
| Humidity | Keep humidity level at 30% – 50% using humidifiers/dehumidifiers. |
Analyzing how temperature and humidity can affect your laminate flooring can profoundly impact your project. Too much humidity can lead to the planks expanding and buckling, while dry conditions can cause gaps and cracking over time. Regularly check the environmental controls in your space and respond accordingly to keep conditions optimal. If necessary, schedule your installation during a balanced season for the best results.
- Conduct environmental tests before installation.
- Monitor conditions closely leading up to your project.
- Consider timing for climate stability.
- Close windows to minimize drafts and humidity variance.
- Thou shall ensure the area is prepared for ideal conditions.
Environmental Adjustments for Laminate Flooring Success
| Factor | Adjustment Strategies |
|---|---|
| Temperature | Keep the area consistently heated or cooled. |
| Humidity | Use needed equipment to eliminate excess moisture. |
Caring for Your Investment: Maintenance Strategies for Longevity
Taking care of your laminate flooring will ensure it looks great and lasts for years. Regular maintenance is vital in preserving its beauty and functionality. From day-to-day cleaning to more involved repairs, adopting the right strategies will help you enjoy your laminate floor to the fullest. By implementing these maintenance tips, you’ll protect your investment and keep your space looking pristine.
Daily Care Regimens: Outlasting Wear and Tear
To prevent wear and tear on your laminate flooring, establish a daily cleaning routine that includes sweeping or vacuuming to remove dirt and debris. Use a microfiber mop with a gentle cleaner specifically designed for laminate surfaces to maintain shine without damaging the finish. Regular maintenance also involves addressing spills promptly to avoid staining or warping, ensuring your floor remains in top condition.
Addressing Potential Issues: Repairing Dents, Scratches, and More
Even with careful maintenance, your laminate flooring may encounter dents, scratches, or other damage over time. Addressing these issues promptly can help maintain the integrity and appearance of your flooring. For minor scratches, a laminate floor repair kit can effectively conceal imperfections, while deeper damage may require a more involved repair process, such as replacing individual planks.
For repairing dents, start by using a damp cloth and a warm iron to help the laminate expand back into shape; be cautious not to scorch the surface. Scratches can often be treated with a colored marker or laminate filler that matches your flooring’s hue. In cases of extensive damage, consider a plank replacement for a seamless finish, ensuring to follow the manufacturer’s guidelines to match the grain and color. Keeping touch-up kits handy and knowing how to address potential issues will go a long way in preserving the beauty and life of your laminate flooring.
The Economics of Laminate vs. Other Flooring: Making an Informed Choice
Choosing laminate flooring over other materials can significantly impact your budget and the aesthetic of your home. With lower initial costs and a broad range of styles, laminate provides an appealing option for many homeowners. However, affordability is just one aspect; performance and longevity should also factor into your decision. This section weighs these elements to help you navigate your flooring options better.
Balancing Cost, Aesthetic, and Performance: A Comparative Analysis
Comparative Analysis
| Flooring Type | Average Cost per Sq Ft |
|---|---|
| Laminate | $1 – $5 |
| Hardwood | $5 – $15 |
| Vinyl Plank | $2 – $6 |
| Tile | $3 – $10 |
Long-Term Value: Assessing Durability and Resale Potential
Laminate flooring offers impressive durability, often outperforming hardwood in resistance to scratches and dents, allowing it to maintain its look for years. Although laminate may not always appreciate like hardwood, its affordability allows for lower initial investment, appealing to budget-conscious buyers or investors. As trends shift toward more cost-effective and visually appealing options, laminate can still retain strong resale potential if properly maintained.
In terms of longevity, laminate typically lasts around 15-25 years, depending on quality and care, compared to hardwood’s 25-100 years. However, modern laminate options have advanced significantly in aesthetics, mimicking natural wood beautifully, which can attract potential buyers. Investing in high-quality laminate can yield excellent returns, particularly in markets where affordability is a major selling point. Overall, when considering resale and durability, laminate presents a wise option for balancing aesthetics and practicality in your home.
Summing up
The Ultimate Guide to Laminate Flooring Installation provides you with necessary tips and tricks to achieve a flawless finish in your home. By following this guide, you can ensure a seamless installation process, allowing you to enjoy the beauty and durability of laminate flooring for years to come. Embrace the step-by-step instructions and expert advice to transform your space effectively, making the most of your flooring project.
