
Many installers and DIYers rush steps that lead to gaps, peaking, improper adhesion, or telegraphing; in this how-to you’ll learn how to assess and prepare your subfloor, acclimate planks correctly, manage expansion gaps, use the right adhesives and tools, and troubleshoot common alignment issues so your SPC vinyl performs and looks professional for years.
Understanding SPC Vinyl Flooring
What is SPC Vinyl Flooring?
SPC (stone plastic composite) uses a rigid limestone-and-PVC core that provides high dimensional stability and low thermal expansion. You’ll commonly find plank thicknesses of 4-8 mm and wear layers from 12-30 mil (0.3-0.75 mm). Installation is typically floating, click-lock style, which allows you to fit it over many existing hard floors and in moisture-prone spaces like basements and kitchens.
Advantages of SPC Flooring
SPC offers waterproof performance, greater stiffness than WPC and standard LVP, and strong scratch and dent resistance-attributes that make it ideal for high-traffic rooms and commercial areas. You can select commercial-grade wear layers (20-30 mil) for retail or 12-20 mil for residential use, and maintenance is simple: routine sweeping and a damp mop with a pH-neutral cleaner.
Because of its rigid core, SPC minimizes expansion gaps and movement you’d see with thinner vinyl; manufacturers commonly recommend leveling if subfloor deviations exceed 3/16″ per 10 ft. It also accommodates acoustic underlayments and many brands are compatible with low-temperature in-floor heating when you follow the supplier’s installation and temperature guidelines.
Common Installation Mistakes
You encounter repeated errors that turn a straightforward SPC install into a headache: inadequate acclimation (less than 24-48 hours), subfloor flatness beyond 3/16″ over 10′, skipped moisture testing (concrete RH >85% per ASTM F2170 or manufacturer limits), incorrect expansion gaps (typically 1/4″-1/2″), and poor layout/measurement planning that wastes 5-15% of material. These specific failures cause edge peaking, uneven seams, and callbacks, so follow manufacturer tolerances and measure before cutting.
Improper Subfloor Preparation
You must verify flatness and moisture before laying SPC: concrete should be tested with in-situ RH probes and meet the manufacturer’s RH limit (often ≤85%); correct high spots above 3/16″ per 10′ with a Portland-based patch or self-leveler; fill cracks deeper than 1/8″. Ensure wood subfloors are rigid, fastened, and free of loose boards, oil, or adhesives that prevent full panel contact.
Inaccurate Measurements
You commonly under- or overestimate material needs by measuring only once or ignoring layout waste. Measure length, width, and diagonals at multiple points, then add 5-10% waste for straight lay and 10-15% for diagonal or patterned installs. Factor in thresholds, closets, and irregular angles to avoid mid-job shortages and excess cutting.
You can prevent layout disasters by calculating rows and end-piece sizes before cutting: for example, a 12′ (144″) width with 7″ planks yields ~21 rows (144 ÷ 7 ≈ 20.6), so plan stagger and end pieces so none finish under 6″. Maintain minimum end-joint stagger of 6-12″ per manufacturer, and dry-fit the first two rows to confirm counts; a miscount often adds 8-12% unexpected waste and delays.
How to Avoid Common Mistakes
Tackle errors by enforcing a clear sequence: acclimate boards 48-72 hours, verify subfloor flatness within 3/16″ over 10 ft, and plan your layout to keep short end joints staggered at least 6″. Use a moisture test (pinless or RH) and confirm room temperature 65-85°F; map transitions and appliance locations to avoid trapped edges and ensure expansion gaps prevent buckling.
Preparation Tips
Before you start, clear and level the subfloor, sweep and vacuum so adhesive or click edges seat properly; confirm floor temperature 65-85°F and relative humidity 30-60% for 48-72 hours.
- Acclimate 48-72 hours.
- Check moisture (RH/pinless).
- Level to 3/16″ over 10 ft.
Assume that you’ll leave a 1/4-1/2″ expansion gap around fixed objects.
Measurement Guidelines
Measure length and width, compute area, then add 8-12% waste for straight installs or 10-15% for diagonals; verify room squareness by comparing diagonals – if they differ more than 1/4″ per 10 ft, adjust your layout. Stagger end joints at least 6″ and plan starter rows so the final plank is longer than 8″.
For example, a 12×15 ft room is 180 sq ft; add 10% waste to get 198 sq ft, and if boxes cover 22 sq ft each you’d purchase 9 boxes. Measure doorways, alcoves and thresholds separately and account for transitions; if the last row would be under 8″, rip the starter row to balance. For runs over 30-40 ft in any direction, plan expansion profiles per manufacturer guidance to avoid cumulative shrink/expansion issues.
Factors Affecting Installation Success
You must control measurable variables to avoid failures: subfloor moisture (ASTM F1869 ≤3 lb/1000 ft²/24 hr or in-situ RH ≤75%), flatness (≤3/16″ over 10 ft), acclimation (24-48 hrs at 65-85°F), and adhesive compatibility.
- Moisture testing: calcium chloride or RH probe; mitigate with vapor barrier or moisture mitigation systems.
- Flatness fixes: grind high spots, use patching compound for low areas.
- Environment: maintain 30-60% RH during and after install.
The continuous monitoring of these metrics reduces callbacks and delamination.
Climate Considerations
You should acclimate planks 24-48 hours and keep the jobsite between 65-85°F with 30-60% RH; failing to do so in places like humid Florida or cold basements often produces gapping, cupping, or buckling. Increase perimeter expansion gaps from 1/4″ up to 1/2″ for runs longer than about 30-40 ft, and avoid installing during rapid seasonal swings without climate control.
Choice of Adhesive
You need to determine whether your installation is floating, loose-lay, or full-spread: click systems typically require no adhesive, while full-spread SPC usually calls for manufacturer-approved acrylic or polyurethane adhesives to achieve 100% transfer. Verify open/working times (commonly 10-30 minutes) and compatibility with the plank backing and subfloor to prevent bond failure or staining.
For full-spread installs you can expect coverage around 200-300 ft²/gal depending on trowel size; you should aim for 100% adhesive transfer and confirm by lifting a test plank after the adhesive sets. Choose water-based acrylic for standard concrete or wood, and two-part polyurethane for high-moisture slabs or radiant-heated floors; prime porous substrates per the TDS, respect flash/open times (5-20 min), and roll with a 75-100 lb roller after placement. Perform and document an adhesive test patch for warranty support.
Tips for a Smooth Installation Process
Sequence tasks to keep the install efficient: acclimate planks 48 hours, measure slab moisture (ASTM F1869 ≤3 lb/1000 ft²/24 hr or ASTM F2170 ≤75% RH), and snap a chalk line for the first row.
- Acclimation – 48 hours in the installation space
- Moisture – F1869 ≤3 lb/1000 ft² or F2170 ≤75% RH
- Layout – stagger end joints ≥6″ (15 cm) and leave a 1/4″ (6 mm) perimeter gap
After the install, check seams, transitions, and baseboards for proper fit.
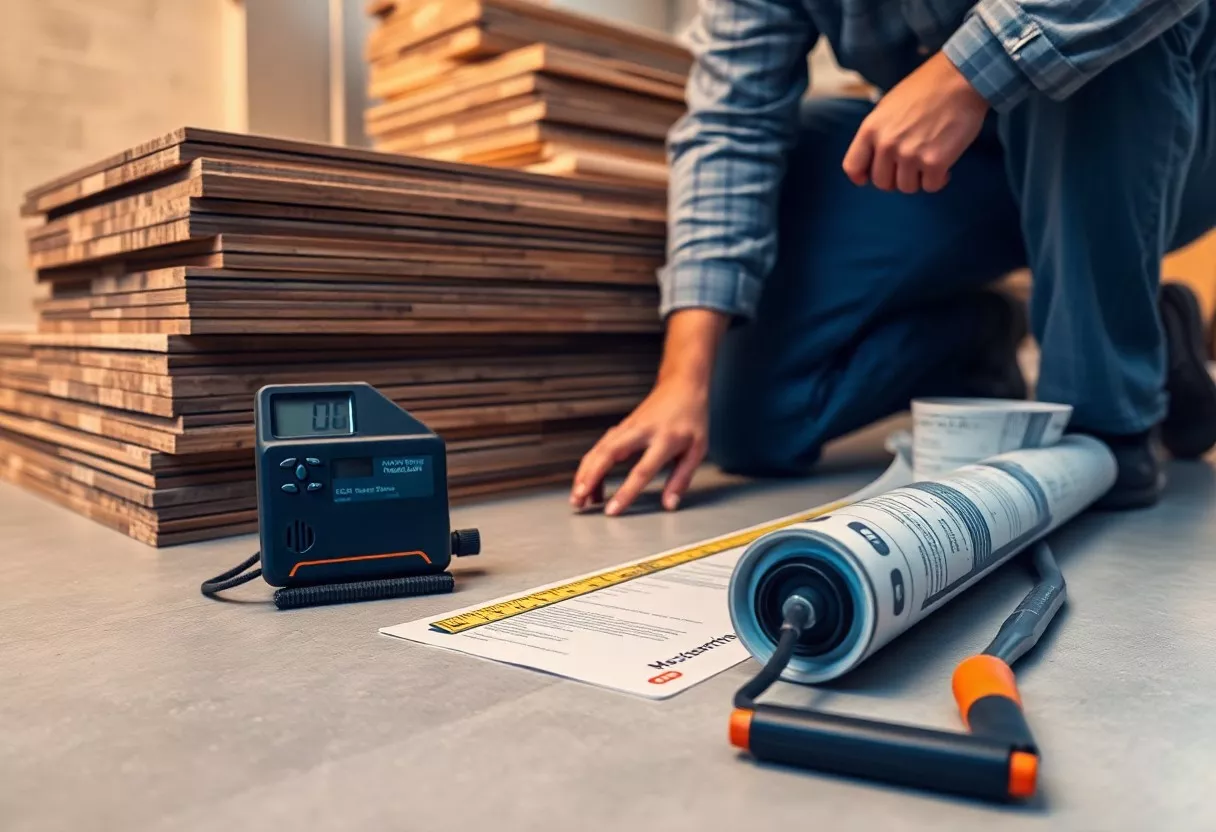
Tools and Materials Checklist
You should gather these items before you begin: tape measure, chalk line, spacers, tapping block, pull bar, rubber mallet, utility knife and straightedge, jigsaw with fine-tooth blade, 40-grit sanding block for subfloor high spots, and a moisture meter; plan for 3-5% extra material for cuts and waste on 200-400 ft² rooms.
Tools & Materials
| Tape measure | Accurate layout; buy a 25′ tape for most rooms |
| Moisture meter | Verify concrete: ASTM F1869 ≤3 lb/1000 ft² or F2170 ≤75% RH |
| Utility knife / straightedge | Score-and-snap cuts for planks; keep extra blades |
| Jigsaw (fine-tooth) | Notches and irregular cuts around pipes or thresholds |
| Tapping block, pull bar, spacers | Protect locking edges and maintain 1/4″ perimeter gap |
| Underlayment (optional) | 2 mm for sound reduction on multi-family projects |
Step-by-Step Installation Guide
You can follow a concise sequence: prepare and level the subfloor, acclimate planks 48 hours, snap a reference line, install the first row along the longest wall, click subsequent rows with staggered joints ≥6″, trim the final row to maintain a 1/4″ gap, and fit transition strips at thresholds; for rooms over 40 ft long, plan expansion joints every 30-40 ft.
Installation Steps
| 1. Subfloor prep | Level to ≤3/16″ over 10′ and confirm moisture limits |
| 2. Acclimation | 48 hours in room temperature 60-80°F (15-27°C) |
| 3. Layout | Chalk line centered for balanced end cuts |
| 4. Installation | Click-lock planks, stagger ends ≥6″ (15 cm), use tapping block |
| 5. Final touches | Trim last row, install transitions, reinstall baseboards |
You should watch for alignment drift-check every 4-6 rows with a straightedge and correct before adhesive sets if using glue; when spanning doorways, use transition profiles and allow 1/4″ expansion perimeter; choose a pressure-sensitive adhesive only if substrate moisture and manufacturer’s limits align, and always keep extra planks from the same production lot for visible areas.
Additional Guidance
| Alignment checks | Verify straightness every 4-6 rows; correct minor drift immediately |
| Large rooms | Install expansion joints every 30-40 ft or as manufacturer recommends |
| Adhesive use | Only when substrate and product permit; follow manufacturer limits |
| Material lots | Use planks from same lot for color consistency; keep 3-5% extra |
Troubleshooting Installation Issues
When seams separate or boards cup, isolate variables: verify slab moisture (ASTM F1869 ≤3 lb/1000 ft²/24 hr), confirm acclimation of 48 hours, and check flatness (≤3/16″ in 10 ft). You should document locations, measure gap widths, and test a repair on scrap to determine whether the fix is a perimeter adjustment, localized leveling, or a re-seat of the locking joint.
Identifying Common Problems
Begin by mapping symptoms: gaps over 1/8″ typically signal movement or poor locking, hollow sounds indicate delamination or uneven substrate, and localized buckling points to trapped moisture or insufficient expansion-measure at least five spots per room with a moisture meter and use a straightedge to find any contours beyond 3/16″ in 10 ft.
Solutions for a Perfect Finish
You can address buckling by easing pressure, increasing the perimeter gap to 1/4″-1/2″, and allowing the floor to stabilize for 24-72 hours; correct hollows by applying manufacturer-approved adhesive or by lifting and leveling the subfloor to meet the 3/16″ in 10 ft tolerance. For tight or misaligned seams, clean debris, re-seat at the proper locking angle (about 20-30°), and use a pull bar plus a seam roller as the manufacturer specifies.
When reworking, mark and remove only affected rows and dry-fit replacements first; on a 200 ft² kitchen, increasing the perimeter gap to 1/2″ and repairing a 3/16″ dip with a cement-based patch cured in 6 hours, then rolling glued sections twice with a 100 lb roller, resolved persistent cupping. You should always use manufacturer-recommended leveling compounds or adhesives, keep repair temperatures between 65-85°F, and monitor one repaired area 24-72 hours before installing trim.
To wrap up
With these considerations, you can avoid common SPC vinyl flooring installation mistakes by preparing subfloors properly, allowing acclimation, following manufacturer specs, using correct tools, and controlling expansion gaps. If you troubleshoot early and double-check measurements, your seams, transitions, and adhesives will perform well. You’ll reduce callbacks, protect warranties, and achieve a durable, professional finish that reflects your attention to detail.
