
Many homeowners feel overwhelmed when it comes to preparing their space for a flooring installation. Taking the right steps will ensure a smooth and efficient process, allowing you to enjoy your new floors sooner. In this article, we will guide you through crucial tips and tricks to help you get your area ready for flooring giant installation. By following these recommendations, you’ll create a functional environment for the professional team, making the whole experience stress-free and successful.
Understanding Your Flooring Options
Before you start preparing your space, it’s vital to understand the various flooring options available to you. Each type of flooring has its unique benefits, aesthetics, and applications. By familiarizing yourself with your options, you can make a more informed choice that aligns with your needs and preferences.
Types of Flooring Materials
Now, let’s explore some popular types of flooring materials:
| Flooring Type | Benefits |
| Hardwood | Timeless appeal and durability |
| Laminates | Cost-effective and easy to maintain |
| Vinyl | Water-resistant and versatile |
| Tile | Durable and moisture-resistant |
| Carpet | Warmth and sound absorption |
This overview provides a starting point for selecting the right flooring for your space.
Choosing the Right Style for Your Space
One key aspect of flooring installation is choosing the right style that complements your space. Consider the overall aesthetic, color palette, and functionality of the room. Your flooring should enhance the existing decor and blend seamlessly with your lifestyle.
For instance, if you have a modern home, sleek hardwood or minimalist vinyl may be the best match, while a rustic space might benefit from distressed wood or patterned tiles. It’s all about finding the perfect balance that reflects your taste and meets your needs. By taking the time to evaluate your style preferences, you’ll ensure that your flooring adds value to your space.
Assessing Your Space
Clearly, understanding your space is vital for a successful flooring installation. Begin by examining the area where the new flooring will be laid, taking note of its dimensions, features, and any peculiarities. This assessment will help you visualize the final outcome and determine how the new flooring will complement your existing decor. Additionally, you should consider the type of flooring material you plan to use, as different materials may require different conditions for optimal installation.
Measuring and Planning Layout
Clearly, accurate measurements are important for ensuring a seamless flooring installation. Start by measuring the length and width of your space, and then multiply these dimensions to find the total square footage. Plus, mark key fixtures like doors and vents on your layout. This will help you visualize how the flooring will fit and flow throughout the area, allowing for a better planning process.
Identifying Potential Obstacles
Planning for installation involves not only the design but also identifying any potential challenges that may arise during the process. Take time to pinpoint obstacles like plumbing pipes, electrical outlets, or uneven subfloors that could interfere with the installation. These factors can impact both the timeline and the installation quality, making it important to address them before your flooring giant arrives.
This proactive approach will help you navigate around issues that could slow down the installation process. Assessing problems such as low ceilings, existing furniture, or old flooring materials can save you time and hassle. Consider reaching out to your flooring giant for guidance on how to manage specific obstacles effectively. They can provide expert advice or solutions tailored to your situation, ensuring that your flooring project goes smoothly.

Preparing the Subfloor
Assuming you want a smooth and successful flooring installation, preparing the subfloor is important. The subfloor serves as the foundation for your flooring material, and any imperfections can lead to complications down the road. Start by ensuring that your subfloor is clean, dry, and level to provide the best support for your new flooring. This step not only improves the appearance but also enhances durability and longevity.
Cleaning and Repairing the Subfloor
On your journey to install new flooring, begin by cleaning the subfloor thoroughly. Remove any debris, dust, or old adhesive residues. Next, inspect for any damage, such as cracks or loose boards, and repair them promptly to create a solid base. Utilizing self-leveling compounds can address uneven surfaces and prevent future issues, ultimately contributing to a flawless flooring installation.
Ensuring Proper Moisture Control
Subfloor preparation requires attention to moisture levels, as excess humidity can compromise your flooring material. Before installing your new flooring, check for any signs of moisture or dampness in the subfloor, using moisture meters if necessary. If you detect moisture issues, consider applying a moisture barrier or using dehumidifiers to create a drier environment. Adequate moisture control is important to protect your flooring investment and prolong its lifespan.
A controlled environment is important for your flooring’s success, as it prevents mold growth and keeps your new flooring looking great. By using moisture barriers or appropriate sealants, you can safeguard your subfloor against potential dampness. Make it a priority to monitor humidity levels in the space, especially in areas prone to moisture, like basements or kitchens. Doing so will ultimately enhance the performance and longevity of your new flooring.
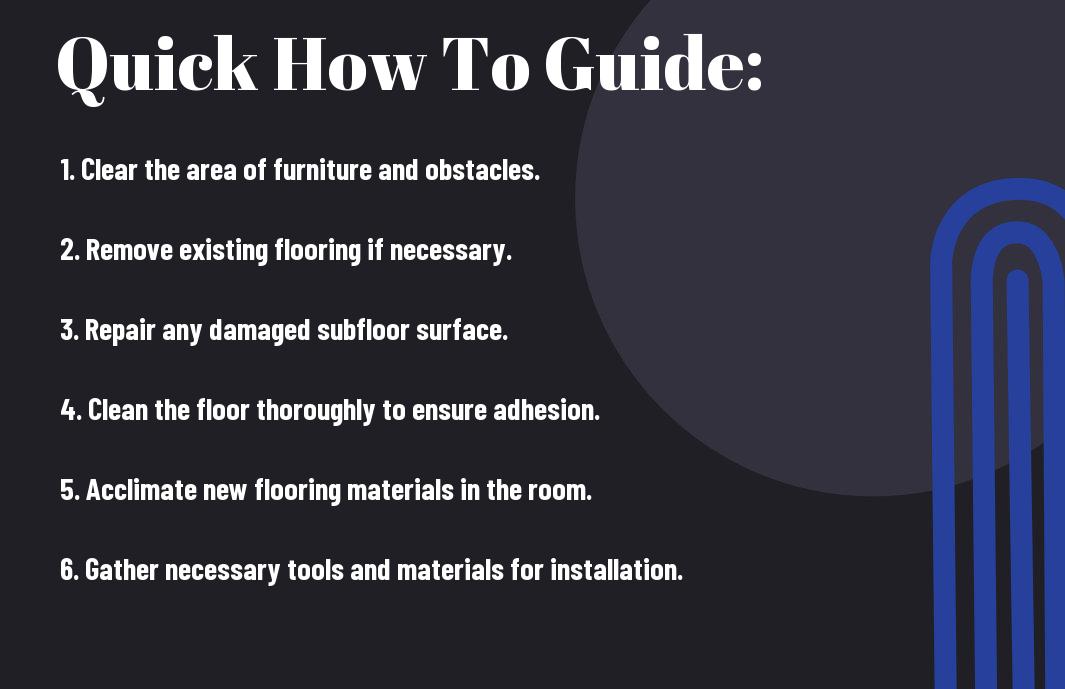
Clearing the Area
For a smooth flooring installation, it’s vital to clear the area where the work will take place. This step not only ensures an efficient process but also protects your belongings from potential damage. By removing items such as furniture, decor, and any obstacles in the way, you create an organized workspace for the installers.
Furniture Removal Tips
For effective furniture removal, consider the following:
- Plan ahead and designate a temporary storage place for your furniture.
- Disassemble large pieces to make them easier to move.
- Use furniture sliders to protect your floors while moving items.
- Ask for help if you’re dealing with heavy or bulky furniture.
Recognizing the importance of a clear space will lead to a more efficient installation process.
Protecting Surrounding Fixtures
One vital aspect of preparing for your flooring installation is to protect surrounding fixtures. This includes baseboards, door frames, and any installed lighting or electrical outlets. These elements are susceptible to damage during the installation process, so taking steps to safeguard them will save you time and money down the line.
Tips for protecting surrounding fixtures include using painter’s tape to shield edges, covering items with cloth or plastic sheeting, and ensuring that any delicate fixtures are moved to a secure location. It’s wise to assess your space ahead of time and determine what needs extra protection to prevent damage while the flooring is being installed.
Tools and Supplies Needed
Not having the right tools and supplies can hinder your flooring giant installation process. Ensure you gather everything necessary before starting the project. This will save you time and eliminate frustration, allowing for a smooth installation experience. In this section, we will break down important tools and needed materials to help streamline your preparation.
Essential Tools for Installation
While you get ready for flooring installation, having the right tools is key to achieving a professional-looking finish. Make sure you have equipment like a measuring tape, utility knife, square, and a hammer. Additionally, a flooring pull bar, tapping block, and spacers are invaluable for ensuring proper alignment and fit. These tools will be your best friends throughout the process.
Necessary Materials and Accessories
Now that you’ve sorted the tools, it’s time to focus on the materials and accessories. You will need underlayment, adhesive or flooring nails, and transition strips, depending on your flooring type. Additionally, keep a stock of safety gear, such as gloves and goggles, to protect yourself while you work.
To ensure your many hours of hard work pay off, select high-quality materials that complement your chosen flooring. Underlayment can provide added comfort and soundproofing, while adhesive and nails will secure your flooring in place. Transition strips will create a seamless finish between different flooring areas. By investing in these necessary materials, you set the stage for a successful installation that enhances the look and longevity of your new floors.
Safety Considerations
All aspects of your space preparation must prioritize safety to ensure a smooth flooring installation. This includes minimizing hazards, using proper equipment, and ensuring the work environment is suitable for installers. Taking these precautions will foster a safer experience for both you and the installation team, ultimately contributing to a successful project.
Personal Protective Equipment
Equipment such as gloves, safety goggles, and masks are necessary for protecting yourself and installers from potential hazards during the flooring installation process. Ensure that everyone involved wears appropriate personal protective equipment (PPE) to minimize the risk of injury from dust, debris, or chemical exposure. This proactive approach fosters a safer working environment and enhances overall project efficiency.
Ensuring Adequate Ventilation
For a safe installation, it is important to maintain good air quality in your work area. Adequate ventilation helps to disperse any fumes or dust that may be generated during the flooring process, keeping the space healthy for everyone involved.
Another effective strategy is to open windows and doors to facilitate air circulation. You can also consider using fans or air purifiers, especially if you’re working with materials that emit strong odors. Proper ventilation not only improves air quality but also helps the adhesive or flooring materials to cure correctly, enhancing the longevity of your new floors.
Final Words
Considering all points, preparing your space for a Flooring Giant installation is vital for achieving the best results. By following the tips and tricks provided, you can ensure that your area is free from debris, properly measured, and ready for the installation team. Take the time to secure any necessary permits and communicate your preferences clearly. This proactive approach will help you enjoy a smooth installation process and achieve the beautiful flooring you desire.
