
There’s a straightforward process you must follow to ensure your subfloor is ready for vinyl: inspect for damage and moisture, clean and remove adhesive or debris, repair or replace any soft spots, level low areas and fill gaps, sand high spots, and install the appropriate underlayment or moisture barrier. You should also verify flatness and secure loose boards so your vinyl lays flat and lasts.
Assessing Your Current Subfloor
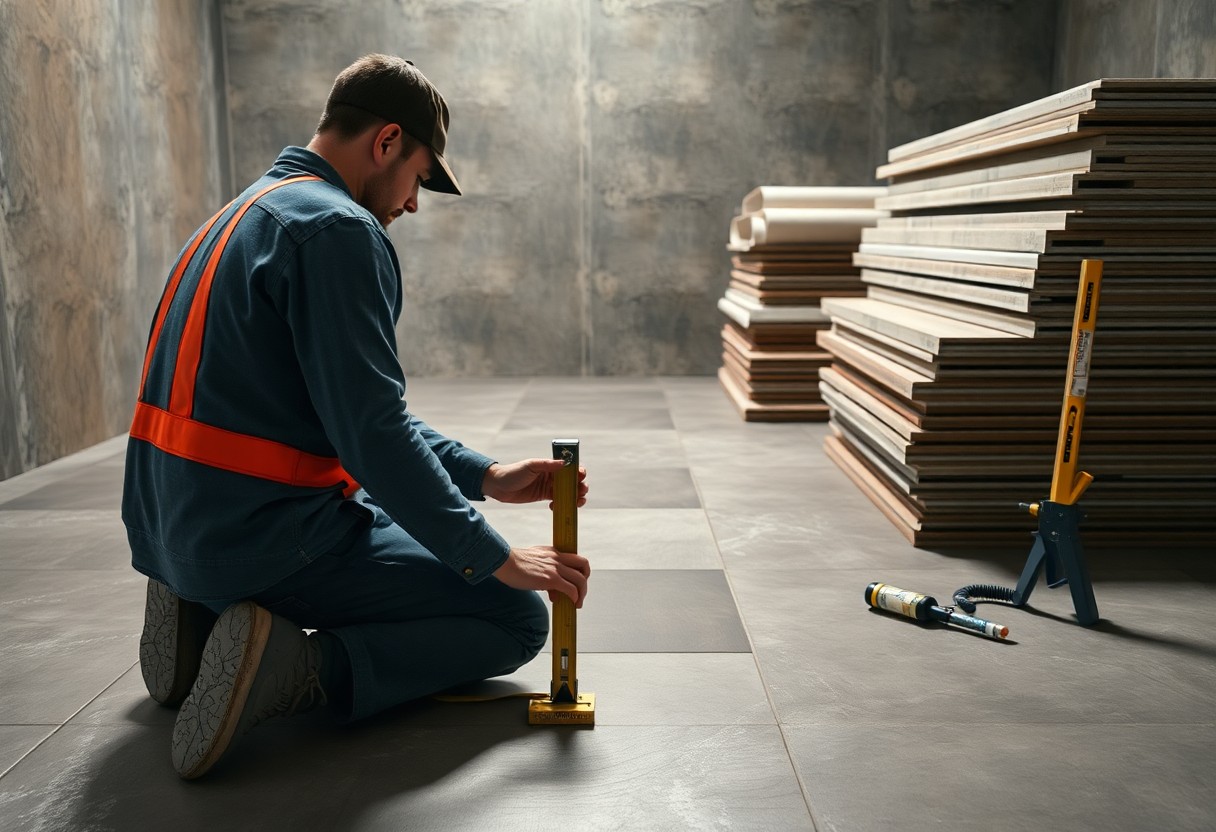
You’ll start by surveying flatness, moisture and structural soundness before laying vinyl. Use a 10-foot straightedge to check for gaps; most vinyl manufacturers allow no more than 3/16″ deviation over 10 feet. Test concrete with a pinless moisture meter and, for adhesives, confirm calcium chloride or ASTM F2170 RH results meet manufacturer limits (often ≤75% RH). Inspect for soft spots, active leaks, and joist deflection; document areas needing leveling, repair, or new underlayment.
Identifying Subfloor Material
Open a closet or check the basement underside to identify whether your subfloor is plywood, OSB, concrete, particleboard, or existing vinyl. Plywood commonly measures 5/8″-3/4″ and tongue-and-groove panels are typical on 16″ joist centers; OSB is often 7/16″-3/4″. Concrete slabs vary by region-typically 3-4″ thick indoors. Particleboard and luan are prone to swelling and are usually unsuitable; if you find them plan to overlay with exterior-grade plywood.
Evaluating Subfloor Condition
Walk the room and press on suspected areas to find soft spots; use a flashlight to spot mold stains and a screwdriver to test delamination. Measure for squeaks and deflection by securing with 2″ screws every 6-8 inches at seams, and use a 10-foot straightedge-anything over 3/16″ high/low needs leveling. For concrete, perform an RH test (ASTM F2170); many manufacturers require ≤75% RH or adhesive failures may occur.
If you discover soft spots or gaps, secure panels with 2″ exterior screws and construction adhesive, or replace damaged sheets; sister joists or add blocking to eliminate bounce. Level dips greater than 3/16″ over 10 feet with a cementitious self-leveling compound on concrete or a feather-edge wood patch on plywood, following manufacturer’s cure times (often 24-48 hours). Finally, overlay with 3/4″ exterior-grade plywood when structural reinforcement is needed and recheck flatness and moisture before proceeding.
Necessary Preparations Before Vinyl Installation
Before you lay product, perform targeted prep: remove contaminants, repair or replace damaged boards, test moisture (ASTM F1869 calcium chloride <3 lbs/1000 ft²/24 hr or ASTM F2170 RH <75%), and confirm flatness (aim for ≤3/16" over 10 ft or ≤1/8" over 6 ft). Also acclimate vinyl per manufacturer (usually 48 hours) and prime porous concrete to improve bond for leveling compounds and adhesives.
Cleaning the Subfloor
You should sweep and vacuum thoroughly, then degrease with a TSP solution or a manufacturer-recommended cleaner to remove wax, oils, and adhesive residue; for wood sand stubborn spots with 80-100 grit and for concrete use a floor grinder or acid etch if needed. Always let the subfloor dry completely-moisture under vinyl will void warranties and weaken adhesives.
Repairing Damage and Uneven Surfaces
Address loose, squeaky or warped plywood by fastening with screws every 6-8″ at edges and 8-10″ in the field or by replacing panels; fill gaps wider than 1/8″ with exterior-grade wood filler. Patch concrete cracks wider than 1/8″ with cementitious repair, use hydraulic cement for active leaks, and aim to keep deviations within the flatness tolerances before applying a leveling product.
For larger leveling jobs use a bonded patch or self-leveling underlayment: prime per product instructions, pour SLU to feather thin to 1/8″ for smoothing or pour thicker with aggregate for depths up to 1/2″ per lift. Allow typical cure times of 2-4 hours for light traffic and 24 hours for full adhesive installation; for deep fills consider multiple lifts and follow manufacturer limits to avoid shrinkage or cracking. Conduct a final straightedge check across multiple 10-ft spans before proceeding.
Moisture Considerations
Before installing vinyl, verify your slab’s RH and MVER: many manufacturers require under 3 lbs/1,000 sq ft/24 hr (ASTM F1869) or below about 75% RH (ASTM F2170) for adhesives and sheet goods; for wood subfloors keep moisture content in the 6-12% range and within 2% of the vinyl product to avoid cupping or adhesive failure.
Testing for Moisture Levels
Use in-situ RH probes (ASTM F2170) as the primary method-place at least one probe per 1,000 sq ft and add tests within 6 ft of exterior walls, drains, or cold joints; supplement with ASTM F1869 calcium chloride tests for MVER and pinless meters to map surface variation. You should stabilize HVAC for 24-48 hours before testing and share results with the vinyl or adhesive manufacturer for acceptance criteria.
Implementing Moisture Barriers
For wood, install 6-10 mil polyethylene with 6-inch taped overlaps and sealed edges; for concrete, apply manufacturer-approved liquid moisture mitigation (epoxy/polyurethane) when tests exceed limits-these systems often cure in 24-72 hours and can lower MVER to meet adhesive specs. You must follow product data sheets for application rates and cure times to preserve warranties.
You should prepare the surface by removing laitance and contaminants-grind or shotblast, then fill cracks and joints with a cementitious patch or appropriate urethane sealant. For liquid-applied barriers, prime per instructions, apply at the specified wet film thickness (often 10-20 mils), broadcast sand if required, and re-test MVER/RH after curing to confirm compliance; tape seams and document results for warranty and installer records.
Choosing the Right Underlayment
Types of Underlayment
Assess your installation goals-sound absorption, comfort, moisture control, and thickness tolerance drive the choice; foam is economical for floating LVT, cork reduces footfall by up to 30%, rubber excels in high-traffic commercial areas, and cement-board underlayment stabilizes uneven subfloors. Any remaining gaps or moisture readings above 3 lbs/1,000 sq ft/24 hr should push you toward a vapor-barrier option.
- Foam: lightweight, adds cushion, common with click-lock LVT.
- Cork: sustainable, reduces impact noise by ~20-30%.
- Felt: densified fiber for thermal insulation and minor leveling.
- Rubber: best for heavy traffic and superior moisture/sound control.
| Underlayment | Best Use / Benefit |
|---|---|
| Foam | Floating residential LVT; economical cushion |
| Cork | Noise reduction, eco-friendly installs |
| Felt | Thermal insulation; evens minor subfloor imperfections |
| Rubber | High-traffic and moisture-prone areas; superior sound control |
Benefits of Underlayment for Vinyl Flooring
You get improved acoustics, added cushion, and a secondary moisture defense when you choose the right underlayment; cork or rubber can cut impact noise by 20-30%, some pads add R-values of 0.5-1.2, and vapor-retardant layers help keep RH/MVER within common manufacturer limits (e.g., under 3 lbs/1,000 sq ft/24 hr or per ASTM F1869).
You should match underlayment to the installation method: for glue-down vinyl over concrete, use a thin cementitious backer or a vapor-barrier pad as recommended; for floating systems over plywood, 1-3 mm foam or 2-4 mm cork often suffices. Manufacturers expect a flatness of about 3/16″ in 10 ft and will deny warranty claims if substrate telegraphing or moisture causes failure, so proper underlayment both protects performance and preserves warranty coverage.
Installation Tips for a Smooth Process
You should sequence tasks to minimize delays: check flatness with a 10-foot straightedge and correct any high/low greater than 1/8″ over 10 ft, verify RH under 3 lbs/1,000 sq ft/24 hr or <65% RH, and plan layout lines to avoid narrow starter rows; use a chalk line and stagger end joints 6-8 inches for stability. After acclimating planks 48-72 hours and confirming adhesive open time, begin full-spread or pressure-sensitive installation following the manufacturer's trowel specs.
- Fix flatness >1/8″ in 10 ft with patch or self-leveler
- Acclimate flooring 48-72 hours at 60-80°F
- Maintain slab RH under specified limits (often <3 lbs/1,000 sq ft/24 hr)
- Leave 1/4″-1/2″ expansion gap; stagger end joints 6-8″
- Roll with a 75-100 lb roller after adhesive set per instructions
Tools and Materials Needed
You should have a 10-foot straightedge, reliable moisture meter and calcium chloride MVER kit, primer, floor patch and self-leveling underlayment (a 50 lb bag covers ~20-30 sq ft at 1/8″), appropriate adhesive, notched trowel per manufacturer, utility knife with extra blades, seam roller, 75-100 lb floor roller, chalk line, knee pads, and transition strips-plus PPE like gloves and eye protection.
Best Practices for Installation
You must follow manufacturer acclimation (48-72 hours), maintain site temperature 60-80°F and RH <65%, use the specified trowel notch and adhesive open time, leave 1/4"-1/2" perimeter expansion, stagger plank ends 6-8", and roll the floor with 75-100 lb equipment to ensure adhesive contact and reduce telegraphing on runs over 20 feet.
On large rooms or commercial jobs over 1,000 sq ft, add movement joints every 20-30 ft and use transition strips at thresholds; for heavy-traffic areas choose full-spread adhesive and avoid foot traffic for 24 hours after rolling, and when moisture readings are borderline apply a vapor-mitigation primer or membrane rated for your measured MVER before adhesive or underlayment installation.

Common Mistakes to Avoid
You can avoid most failures by addressing the typical oversights: unevenness, loose boards, and moisture. For vinyl, manufacturers often demand slab MVER under 3 lbs/1,000 sq ft/24 hr (ASTM F1869) and RH below ~75% (ASTM F2170), and flatness within about 1/8″ over 6 ft; skipping any of these checks commonly leads to bubbling, adhesive breakdown, or premature wear.
Ignoring Subfloor Issues
You should repair squeaks, nail pops, and deflection before laying vinyl; small gaps over 1/8″ at seams or high spots that show against a 10-foot straightedge will telegraph through thin vinyl. Use screws to tighten loose boards, sand or grind high spots, and apply a cementitious patch or self-leveler where needed to meet flatness and stiffness requirements.
Skipping Moisture Tests
You must test for moisture with both calcium chloride (MVER) and in-situ RH probes when installing over concrete: many warranties require MVER ≤3 lbs/1,000 sq ft/24 hr and RH ≤75%. Skipping these tests risks adhesive failure, cupping, or discoloration within months of install.
For more detail, perform ASTM F1869 calcium chloride tests (60-72 hours per test) across a floor grid and ASTM F2170 RH tests by placing probes at 40% of slab depth in drilled holes; test density should be one test per 1,000 sq ft or per room. If results exceed limits, install a manufacturer-approved vapor barrier, use a moisture-mitigating adhesive, or remediate the slab before proceeding to protect your warranty and the finish.

Final Words
To wrap up, you should ensure your subfloor is clean, dry, level and structurally sound before installing vinyl; remove debris, repair gaps or squeaks, sand high spots and fill low areas, and perform a moisture test to prevent future issues. Install the recommended underlayment and allow materials to acclimate to the room temperature and humidity. Taking these steps will help you achieve a stable, long-lasting finish and avoid costly problems later.
