
Installation of laminate flooring can transform your space, offering both beauty and durability. In this comprehensive guide, you will learn necessary tips and tricks to ensure your laminate flooring project goes smoothly and achieves a flawless finish. From preparation to final touches, you’ll gain insights to help you avoid common pitfalls and make the most of your DIY experience. Let’s probe the step-by-step process that will enable you to enhance your home with stunning laminate floors.
Understanding Laminate Flooring
The world of laminate flooring offers a practical and stylish alternative to traditional materials. Composed of multiple layers, laminate mimics the appearance of wood, tile, or stone while providing durability and ease of maintenance. As you consider options for your home, understanding its composition and benefits will help you make an informed choice that suits your lifestyle and aesthetic preferences.
Types of Laminate Flooring
While exploring laminate flooring options, you’ll come across various types that cater to different needs and settings. Each type is designed with specific features to enhance your flooring experience. Here’s a breakdown of common types:
| Standard Laminate | Ideal for residential use with various designs |
| Waterproof Laminate | Offers protection against spills and humidity |
| High-Gloss Laminate | Features a shiny finish that adds elegance |
| Textured Laminate | Provides an authentic, natural look and feel |
| Thick Laminate | Durable option for high-traffic areas |
This variety ensures you find the perfect fit for your home.
Pros and Cons of Laminate Flooring
Even with its many benefits, laminate flooring also has drawbacks that you should consider before making your choice. Knowledge of these aspects will help you decide if it aligns with your needs. The following information provides a comprehensive overview of the advantages and disadvantages:
Pros and Cons of Laminate Flooring
| Pros | Cons |
| Durable and scratch-resistant | Can fade in direct sunlight |
| Easy installation | Not as easily repaired as hardwood |
| Low maintenance | Limited resale value compared to wood |
| Variety of styles available | Can sound hollow underfoot |
| Cost-effective option | Requires a flat, stable subfloor |
Flooring decisions are vital for creating the right ambiance in your space. Balancing the pros and cons can illuminate whether laminate flooring is the right choice for your home. For instance, while its durability makes it suitable for families or pets, you might need to factor in potential fading and the importance of careful installation. By understanding these elements, you can make a decision that suits your lifestyle and design preferences.
Factors to Consider Before Installation
If you’re planning to install laminate flooring, consider the following factors to ensure a successful project:
- Your climate and humidity levels
- The type of laminate and its moisture resistance
- Traffic levels in the area to be floored
- The existing subfloor condition
- Your budget and material choices
After careful evaluation of these factors, you can proceed confidently with your laminate flooring installation project.
Subfloor Preparation
You need to ensure that your subfloor is clean, dry, and level before beginning the laminate installation. This includes repairing any imperfections, removing debris, and checking for moisture levels to prevent future issues. A properly prepared subfloor will not only contribute to the durability of your laminate floor but also provide a more aesthetic finish.
Environmental Considerations
To achieve the best results, consider the environmental factors affecting your laminate flooring installation. Factors such as humidity, temperature, and ventilation play a significant role in the longevity of your flooring.
Plus, laminate flooring can expand and contract with changes in temperature and humidity. It’s important to acclimate your laminate planks in the room where they will be installed for at least 48 hours prior to installation. Make sure to maintain a consistent indoor climate and provide proper ventilation to avoid warping and other damage over time.
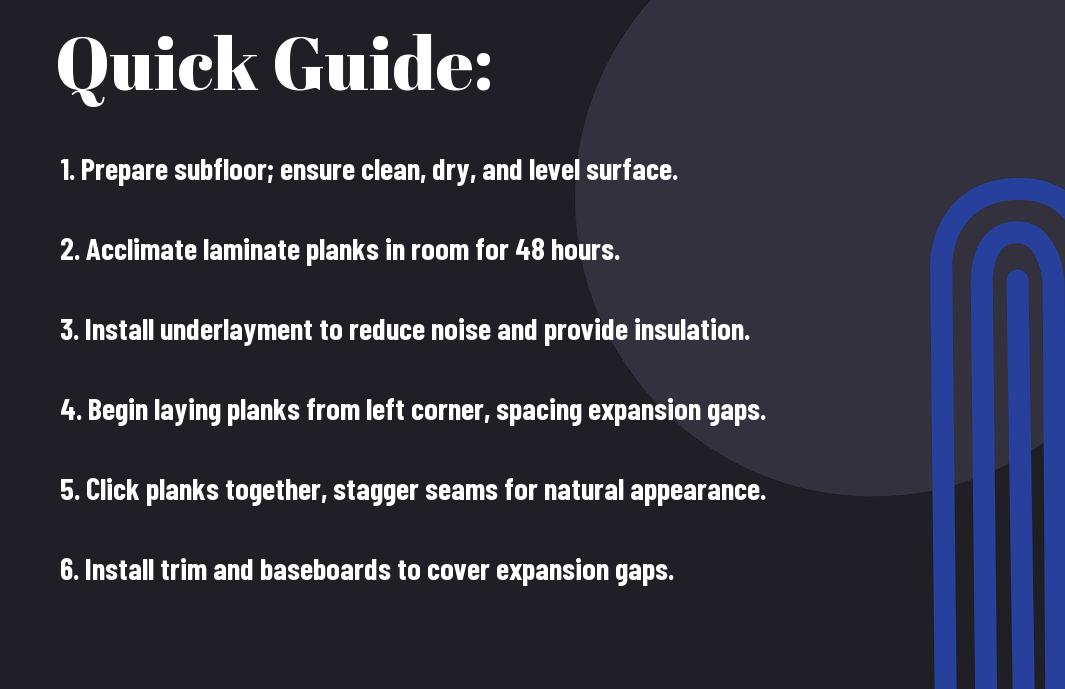
Step-by-Step Installation Guide
To ensure a successful laminate flooring installation, follow these systematic steps. This guide breaks down the process, making it easy for you to achieve a flawless finish with your new flooring.
| Step | Description |
|---|---|
| 1. Prepare the Subfloor | Ensure the subfloor is clean, dry, and level before installation. |
| 2. Acclimate the Flooring | Allow the laminate planks to adjust to the room’s temperature and humidity for 48 hours. |
| 3. Lay Underlayment | Install the underlayment to provide cushioning and moisture protection. |
| 4. Start Installation | Begin laying the planks from the corner, clicking them into place. |
| 5. Cut and Fit Planks | Measure and cut planks to fit around corners and edges. |
| 6. Finishing Touches | Add baseboards or transition strips to complete your project. |
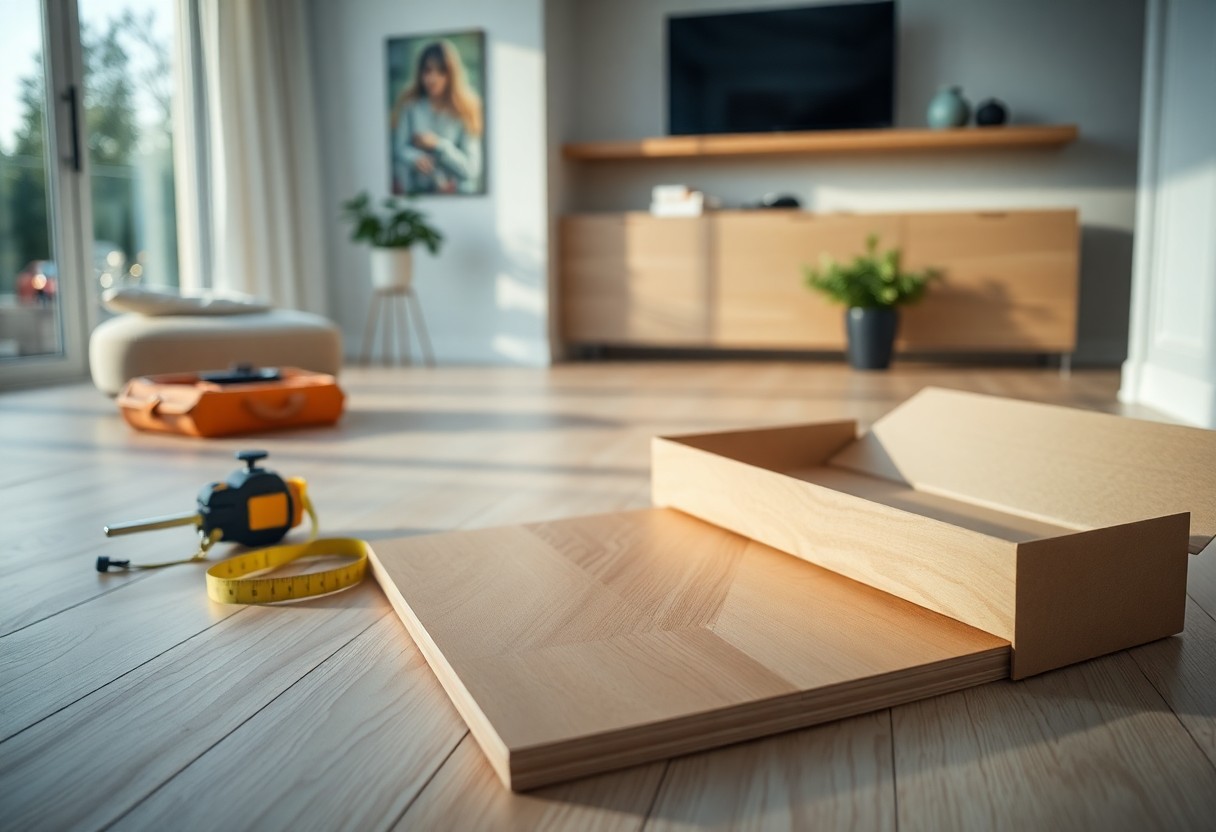
Tools and Materials Needed
One of the first steps in your laminate flooring installation is gathering the necessary tools and materials. You’ll need a measuring tape, saw, spacers, rubber mallet, and a utility knife, among other supplies. Having these items on hand simplifies the process and helps to ensure you stay on track throughout your installation.
Installation Process
Clearly, the installation process involves detailed steps that require your attention to detail. Once you’ve prepared your subfloor and acclimated your laminate, carefully lay down the underlayment before placing the planks. You’ll want to start from the corner of the room and use spacers to maintain an expansion gap. As you work your way across the room, cut the planks as needed for a snug fit around corners and the edges of your walls.
To achieve a seamless look, align the planks properly, ensuring tight connections without gaps. Be methodical as you lay each piece, using the rubber mallet to secure them together gently. After completing the installation, inspect the flooring for any imperfections. Finally, install your baseboards or transition strips for a polished appearance that complements your newly updated space.
Tips and Tricks for a Flawless Finish
Unlike traditional flooring options, laminate installation requires attention to detail for an impeccable look. To ensure your project goes smoothly, consider these necessary tips:
- Ensure the subfloor is clean and level.
- Use spacers to maintain expansion gaps.
- Install planks in a staggered pattern for better stability.
- Check boards for defects before installation.
Any oversight can lead to issues, so take your time to achieve the best results.
Achieving the Right Alignment
Tricks to achieve proper alignment begin with laying your first row straight and parallel to the longest wall. Use a chalk line to mark the starting point, aiding in visual precision as you fit each plank. Adjusting your planks and continually checking alignment throughout your installation will help avoid gaps and misalignment down the line.
Seam Sealing Techniques
There’s a variety of methods to ensure your seams are tight and look great. Begin by carefully cleaning the edges of each plank before installation to promote adhesion. Utilizing seam sealing tape can create a water-resistant barrier, while silicone caulk along the edges effectively fills any tiny gaps that could lead to moisture infiltration. Consider using a seam sealer specifically designed for laminate flooring to further enhance durability.
Seam sealing is necessary for maintaining your laminate flooring’s aesthetic and longevity. Apply the chosen sealing method as you lay each plank, ensuring that no moisture finds its way into the seams, which could cause warping or damage over time. A meticulous approach to seam sealing will significantly enhance your floor’s appearance and durability.
Common Mistakes to Avoid
Despite the ease of laminate flooring installation, there are several common mistakes that can impact your final result. By being aware of these pitfalls, you can ensure a smooth and visually appealing finish. Taking the time to avoid these traps will save you time and minimize frustration throughout the project.
Miscalculating Measurements
An accurate measurement is the foundation of any successful laminate flooring project. If you miscalculate your room dimensions, you may either run short on materials or end up with excess flooring that doesn’t match. Always double-check your measurements, accounting for corners, transitions, and any obstructions, to ensure you purchase the correct amount of laminate and underlayment.
Ignoring Acclimation Time
Measurements, while vital, are only part of the installation process. Ignoring acclimation time can lead to significant issues with your flooring. Laminate boards need time to adjust to the humidity and temperature of your home before installation. Skipping this step can cause expansion or contraction, resulting in gaps or buckling over time. Ensure the planks acclimate in the room where they will be installed for at least 48 hours, allowing for a uniform fit and finish.
Mistakes made during acclimation can have lasting effects on your laminate flooring. If panels are installed too soon, they might warp or create unsightly gaps as they adjust to their environment post-installation. Take the time to place the unopened boxes of laminate in the designated area, allowing them to adapt to the room’s conditions. This small yet significant step will lead to a more stable and durable floor, enhancing the longevity of your installation.
Maintenance and Care
Keep your laminate flooring looking its best by implementing regular maintenance and care routines. This includes promptly addressing spills, avoiding excessive moisture, and using the correct cleaning products to preserve the condition of your floor. By giving your laminate flooring the attention it needs, you can ensure it remains beautiful and functional for years to come.
Cleaning Tips
Now, you can keep your laminate floors clean with these effective strategies:
- Use a soft broom or vacuum to remove dust and debris.
- For deeper cleaning, use a damp mop with a mild cleanser specifically for laminate floors.
- Avoid using abrasive cleaners or tools that could damage the surface.
- Dry the floor thoroughly after mopping to prevent moisture damage.
Recognizing the right cleaning techniques will help maintain the appearance and lifespan of your flooring.
Long-term Preservation
Longterm care is important in maintaining the integrity of your laminate flooring. Be mindful of heavy furniture placement, using felt pads under furniture legs to prevent indentations. It’s also wise to rotate rugs and mats regularly to ensure even wear. Additionally, consider using window treatments to reduce direct sunlight exposure, which can cause fading and warping over time.
Cleaning and maintaining your laminate flooring involves a few straightforward steps that protect its surface and prolong its life. Regularly inspect your flooring for any signs of damage and address them immediately. Implement a cleaning schedule that includes daily sweeping or vacuuming, as well as periodic deep cleaning with appropriate products. By being proactive with care and maintenance, you can preserve your laminate floors’ beauty and functionality for the long haul.
Final Words
Upon reflecting on the process of laminate flooring installation, you should feel equipped with the knowledge and techniques necessary for achieving a flawless finish. By following the tips and tricks outlined in this guide, you can confidently tackle your project with the assurance that the results will enhance your space effectively. Embrace the journey and don’t hesitate to adapt these strategies to suit your personal style and preferences, ensuring that your new flooring meets your expectations for beauty and functionality.
