
Mistakes during a giant flooring installation can lead to costly repairs and unsatisfactory results. As you initiate on this project, it’s necessary to be aware of the common pitfalls that can undermine your efforts. From improper measurements to neglecting subfloor preparation, these errors can significantly affect your flooring’s durability and appearance. By understanding what to avoid, you can ensure a smoother installation process and enjoy your new floor for years to come.
Planning and Preparation
Thorough planning and preparation lay the foundation for a successful giant flooring installation. Assessing the space and ensuring accurate measurements are vital steps that can influence the entire project outcome. Neglecting these elements can lead to costly mistakes and wasted materials, which you want to avoid at all costs.
Assessing the Space
Assessing your space involves evaluating factors like existing flooring conditions, room dimensions, and any obstacles such as doorways or built-in features. This evaluation helps you determine the best flooring options available and any preparatory work required, ensuring a smooth installation process.
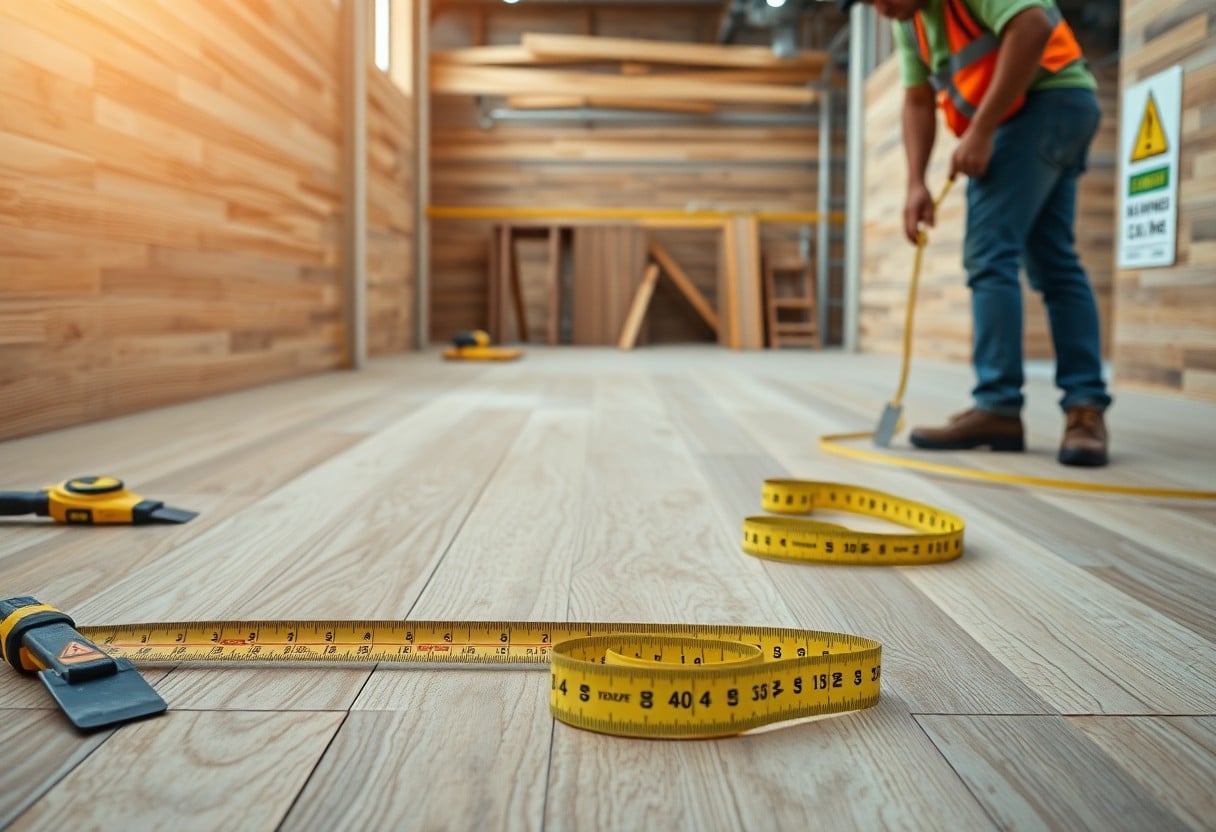
Measuring Accurately
Accurate measurements form the backbone of any flooring project, as even slight deviations can affect how the final product fits. Using a reliable tape measure, you should double-check lengths and widths, accounting for any irregular shapes or unique features in your space.
To ensure precise measurements, start from a consistent reference point and measure multiple times before deciding on your dimensions. If your space includes corners or alcoves, break those areas down into smaller sections to avoid miscalculations. It’s advisable to jot down each measurement and visually inspect the area to catch any potential discrepancies early on. This practice not only minimizes waste but also helps maintain the integrity of your flooring installation. Accuracy in measurements can save you time and money significantly by reducing the likelihood of needing adjustments later on in the project.
Choosing the Right Materials
The materials you select significantly impact the durability, aesthetics, and maintenance of your giant flooring installation. Research various flooring types that align with your design preferences, usage patterns, and environmental conditions. Consider factors like moisture resistance, wear ratings, and warranty offerings to ensure you make a well-informed choice.
Understanding Flooring Options
Exploring different flooring options is important to finding the right match for your space. Popular choices include hardwood, laminate, vinyl, and tile, each bringing unique benefits and drawbacks. Evaluate factors such as installation ease, comfort underfoot, and longevity to make a decision that suits your lifestyle and design vision.
Quality vs. Cost
Balancing quality and cost can be challenging when selecting flooring materials. While it may be tempting to opt for cheaper alternatives, investing in high-quality products often results in longer-lasting performance and reduced maintenance costs over time.
Higher-quality flooring typically uses superior materials that offer better durability and aesthetics. For instance, whereas low-cost laminate might last only a few years, solid hardwood can remain beautiful for decades if properly maintained. Budget accordingly to ensure you aren’t just choosing based on initial expense; consider lifecycle costs, including installation and replacement. A well-chosen, quality product can save money long-term, enhancing both the value of your home and your enjoyment of the space.
Improper Subfloor Preparation
Your giant flooring installation can only be as good as the subfloor beneath it. Inadequate preparation leads to a variety of issues, including uneven surfaces, increased wear, and premature failure of the flooring. Properly inspecting and preparing the subfloor is imperative to ensure a stable and lasting foundation. Skipping this step can result in costly repairs and dissatisfaction with your new flooring.
Importance of a Level Base
A level base is fundamental for your flooring’s performance and aesthetics. An uneven subfloor can cause your flooring to warp, buckle, or develop gaps over time. Ensuring the surface is flat prevents stress in the flooring material and provides a smooth visual appeal. You can use a level tool to check for flatness, aiming for no more than a 1/8 inch dip per 10 feet.
Addressing Moisture Issues
Moisture can wreak havoc on flooring installation. If you ignore existing moisture problems, your flooring may warp, mold, or degrade. Conducting a moisture test can help identify vapor levels in the subfloor. Using moisture barriers or sealants is imperative to protect your flooring investment from the damaging effects of excess moisture.
Addressing moisture issues begins with a thorough inspection of the subfloor for any signs of leaks or dampness. Utilize a moisture meter to gauge the moisture levels; ideally, they should be below 12%. If moisture is detected, allow the subfloor to dry or employ dehumidifiers. Installing a moisture barrier beneath the flooring acts as a safeguard, preventing potential water damage and extending the life of your flooring. This proactive approach can save you from extensive repairs in the future and ensure your flooring remains in optimal condition.
Installation Techniques
Your installation techniques play a vital role in the final look and performance of your giant flooring. Employing proper methods ensures a seamless application that minimizes future issues. Techniques vary depending on the type of flooring material, such as glue-down, nail-down, or floating systems, and understanding these differences can significantly affect your installation’s success.
Following Manufacturer Guidelines
Adhering to manufacturer guidelines is necessary for a successful flooring installation. Each product comes with specific instructions regarding acclimation, layout, and installation procedures that must be followed closely. Neglecting these guidelines can void warranties and result in poor performance or damage to your flooring.
Common Installation Errors
Common installation errors often stem from a lack of attention to detail or failure to adhere to guidelines. Issues such as uneven seams, improper spacing, and inadequate adhesive application can compromise the integrity and aesthetics of your flooring. Being meticulous during the installation process minimizes these mistakes.
For instance, failing to stagger seams can create weak points in your flooring, leading to premature wear and possible warping. Additionally, not using the recommended amount of adhesive may result in loose planks or tiles, while incorrect spacing can lead to unsightly gaps or buckling. It’s critical to continuously check your work as you progress, ensuring a flawless finish that enhances your space.
Tools and Equipment
Having the right tools and equipment is fundamental for a smooth giant flooring installation process. A well-equipped workspace allows for increased efficiency and precision, ensuring that every aspect of the job runs seamlessly. Make sure to familiarize yourself with your tools ahead of time and keep them organized to minimize any disruptions during installation.
Essential Tools for Installation
Essential tools for your giant flooring installation include a tape measure, flooring cutter, spacers, level, and a mallet. Investing in quality equipment makes a significant difference in accuracy and the overall finish of your project. Specialized tools like a pull bar and knee pads can also enhance comfort and effectiveness while installing large flooring sheets.
Utilizing the Right Techniques
Applying the right techniques during your giant flooring installation ensures longevity and aesthetic appeal. Techniques such as acclimating flooring materials and maintaining proper expansion gaps prevent future issues. Additionally, using correct cutting methods minimizes waste and maintains the integrity of your flooring.
It’s imperative to employ specific techniques during installation to avoid pitfalls. For instance, acclimating flooring materials involves allowing them to adapt to the room’s temperature and humidity for at least 48 hours, which helps prevent warping post-installation. When cutting, use a straight edge and a sharp blade for clean edges; jagged cuts can cause problems during fitting. Lastly, always check your work with a level throughout the process to ensure everything aligns properly. These techniques collectively contribute to a durable and visually appealing result.
Post-Installation Procedures
After completing your giant flooring installation, it’s crucial to focus on post-installation procedures to ensure the longevity and performance of your flooring. Proper care and maintenance will help you enjoy your new floor for years to come. Additionally, conducting thorough inspections at this stage can catch potential issues early on, saving you time and money in repairs.
Cleaning and Maintenance Tips
Beginning with a clean surface is key. Use a damp mop and mild detergent to remove any installation debris. Avoid harsh chemicals that could damage your floor. Regular maintenance should involve:
- Vacuuming or sweeping daily to eliminate dirt and dust.
- Placing mats at entry points to reduce dirt transfer.
- Addressing spills immediately to prevent staining.
Knowing these practices will help maintain your floor’s appearance and functionality.
Final Inspections
Conducting final inspections is vital to ensuring your flooring installation meets quality standards. Check for any gaps, uneven surfaces, or loose planks that could affect performance. You should also verify that transition strips are secure and properly fitted, which will help prevent tripping hazards. Look closely at the edges of your flooring to ensure a neat finish against walls and other surfaces.
This phase involves evaluating measurement accuracy and ensuring the floor integrates seamlessly with adjoining surfaces. Use a level to assess any uneven areas; slight imperfections can often be corrected with minor adjustments. Take the time to ensure that all elements, such as baseboards and moldings, are properly aligned and secure, enhancing the overall aesthetic of your space. Thorough final inspections can help you identify and address any issues before they evolve into larger, costlier problems down the line.
To wrap up
Hence, avoiding common mistakes during a giant flooring installation is crucial for achieving the best results. Ensure you properly measure your space, prepare the subfloor adequately, and choose the right materials for your project. Additionally, follow manufacturer guidelines and allow for expansion gaps to prevent future issues. By being attentive to these details, you can achieve a seamless and professional-looking installation that enhances your space and longevity of the flooring.
