
Vinyl flooring can transform your space with its durability and aesthetic appeal, but achieving a flawless finish requires careful attention to detail. You’ll benefit from insights and techniques shared by industry experts who specialize in vinyl installation. By following their professional tips, you can ensure that your flooring not only looks good but also stands the test of time, creating a beautiful and functional environment in your home.
Understanding Vinyl Flooring
Vinyl flooring presents an appealing option for homeowners due to its versatility and resilience. Whether you’re upgrading a single room or renovating your entire home, vinyl can mimic the appearance of wood, tile, or stone, providing both style and comfort. With advancements in technology, modern vinyl flooring comes in various forms and styles that suit different tastes and environments, making it a popular choice for various applications.
Types of Vinyl Flooring
There are several types of vinyl flooring, each catering to specific needs and preferences:
- Luxurious Vinyl Tiles (LVT)
- Luxury Vinyl Plank (LVP)
- Sheet Vinyl
- Vinyl Composition Tile (VCT)
- Waterproof Vinyl Options
The choice between these types depends on your specific requirements.
| Type | Description |
| Luxurious Vinyl Tiles (LVT) | High-end design, mimics natural materials. |
| Luxury Vinyl Plank (LVP) | Resembles hardwood flooring, versatile formats. |
| Sheet Vinyl | Easy to install, ideal for large spaces. |
| Vinyl Composition Tile (VCT) | Durable, perfect for commercial settings. |
| Waterproof Vinyl Options | Resistant to moisture, perfect for bathrooms. |
Benefits of Vinyl Flooring
Choosing vinyl flooring comes with an array of benefits that make it an excellent investment for your home. Its resistance to water, low maintenance requirements, and ability to withstand heavy foot traffic contribute to its popularity. Moreover, vinyl is relatively affordable compared to other flooring options and provides excellent comfort underfoot, making it ideal for families and pet owners.
Additionally, vinyl flooring offers a wide range of aesthetic choices, ensuring you can find a style that complements your home decor. Whether you prefer a rustic wood look or a contemporary stone finish, vinyl can seamlessly fit into any design. The material’s simple cleaning process saves you time and effort, further enhancing its appeal. Furthermore, the cushioning effect of vinyl provides added comfort while walking and reduces noise levels, making your living space more tranquil. Overall, the durability, aesthetic versatility, and ease of maintenance solidify vinyl flooring as a smart choice for any homeowner.
Preparing for Installation
Preparation is important for a seamless vinyl flooring installation. Before laying down your new floor, you need to ensure the subfloor is clean, dry, and free of any debris. This creates a perfect base for the vinyl, preventing future issues like buckling or uneven surfaces. Additionally, acclimating the vinyl planks to the room’s temperature for at least 48 hours prior to installation helps prevent expansion or contraction post-installation. Taking these steps will set you up for a successful and polished finish.
Tools and Materials Required
You’ll need a few key tools and materials for a flawless installation. Essential items include a utility knife, measuring tape, straight edge, and a roller for ensuring proper adhesion. Additionally, having a chalk line, a trowel for adhesive application, and spacers for expansion gaps will help in achieving a professional look. Don’t forget your safety gear, such as knee pads and gloves, to keep you comfortable during the process.
Measuring and Planning Your Space
Accurate measurements lay the groundwork for successful vinyl flooring installation. Start by measuring the length and width of the room, then calculate the total square footage. Ensure you account for any nooks, crannies, or cut-outs for doors and cabinets. Having precise measurements allows you to purchase the right amount of material, minimizing waste and ensuring a proper fit.
To measure your space accurately, use a measuring tape and record dimensions on a notepad. Begin from one wall and extend to the opposite, noting the width and length. If your room has irregular shapes, break it down into smaller rectangles or squares, calculating the total area for each segment before summing it up. Always add an extra 10% to your total to account for mistakes or future repairs, ensuring you have enough material on hand for a flawless installation.
Subfloor Preparation
Effective vinyl flooring installation hinges on thorough subfloor preparation, which sets the foundation for a successful finish. Ensure your subfloor is clean, dry, and level before you begin. Take time to remove old flooring, debris, and any remnants of adhesives. A flat surface can help prevent issues like buckling or gaps, guaranteeing your new vinyl will adhere properly and last longer.
Inspecting and Repairing the Subfloor
Inspect your subfloor for any signs of damage, such as cracks or unevenness. Fill in any gaps with a suitable filler and sand down rough edges to create a smooth, stable surface. If you discover extensive damage, it may be necessary to replace sections of the subfloor entirely to ensure a solid foundation for your vinyl flooring.
Ensuring Proper Moisture Levels
Checking the moisture levels of your subfloor is important for vinyl flooring longevity. Excess moisture can lead to mold growth and damage the flooring, so conduct a moisture test using a moisture meter. Ideally, your subfloor should maintain moisture levels below 12%. If levels are high, consider using dehumidifiers or moisture barriers to mitigate any issues before installation.
To effectively manage moisture levels, you might apply a moisture-proof underlayment or seal the concrete with a quality sealant. Another approach is to acclimate your vinyl flooring in the room where it will be installed, allowing it to adapt to the specific temperature and humidity. This ensures better adhesion and prevents expansion or contraction post-installation, safeguarding your investment and maintaining the appearance of your new flooring.
Installation Techniques
Effective installation techniques can significantly impact the aesthetics and durability of vinyl flooring. Start by ensuring your subfloor is clean, dry, and level, which helps prevent issues down the line. Use the right tools, such as a utility knife and straight edge, for precise cuts. Additionally, acclimate the vinyl to the room temperature before installation to minimize expansion or contraction.
Techniques for Different Vinyl Types
Different types of vinyl, such as sheet, tile, or plank, require specific installation techniques. For sheet vinyl, seamless installations are ideal for minimizing joints. Tiles often use a grid system for alignment, while planks benefit from the click-lock installation method. Consider these techniques:
- Sheet vinyl: full adhesion recommended.
- Vinyl tile: stagger seams for a natural look.
- Luxury vinyl planks: use click-lock for easy assembly.
- Adhesive vinyl: ensure proper curing time.
- Assume that proper installation affects longevity.
| Vinyl Type | Installation Technique |
| Sheet | Full adhesion with seams sealed |
| Tile | Grid layout with staggered seams |
| Plank | Click-lock method for easy installation |
| Peel and Stick | Ensure a flat, clean surface |
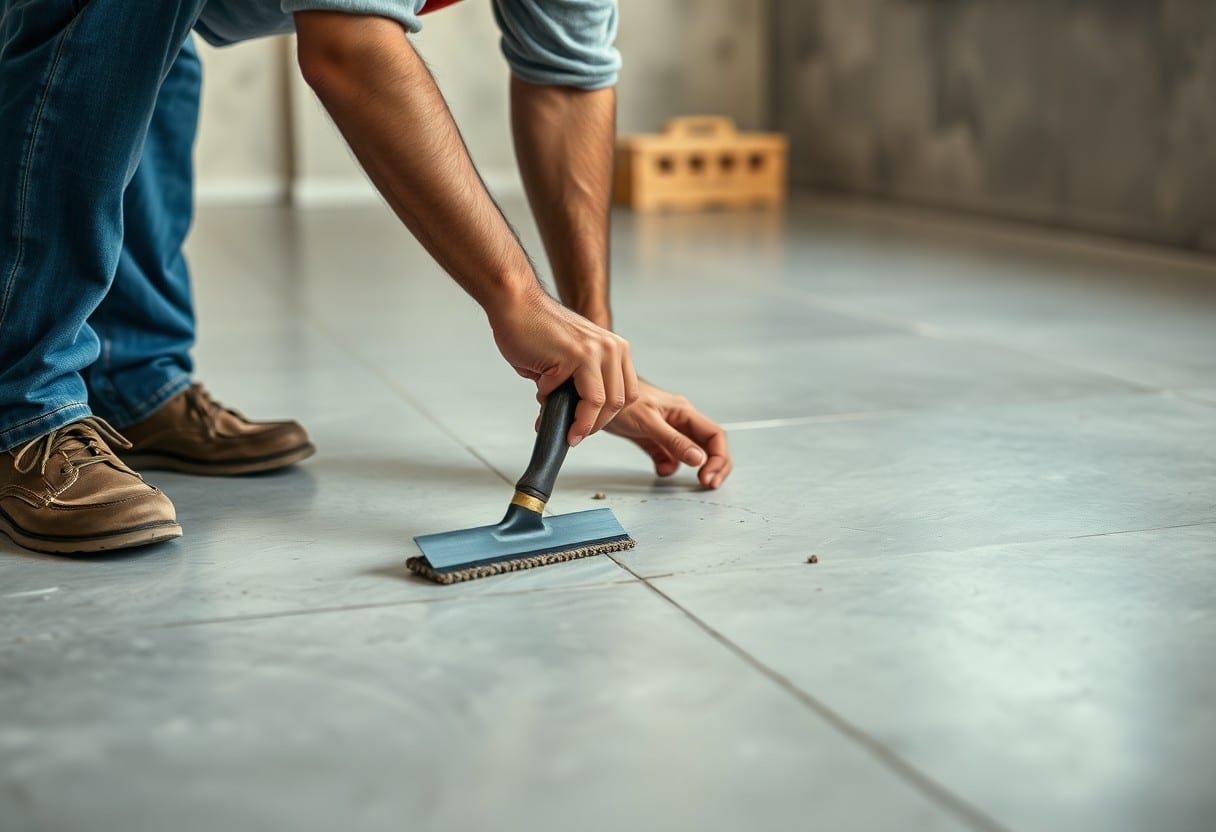
Seam Placement and Adhesive Use
Proper seam placement and adhesive selection are vital for your vinyl flooring’s overall integrity. Plan your layout to minimize visible seams and choose the right adhesive based on the vinyl type. A strong bond ensures that the tiles or planks remain securely in place, preventing lifting or curling over time.
When placing seams, consider the room’s traffic flow and lighting to conceal them effectively. Use high-quality adhesive recommended for your specific vinyl to prevent moisture-related issues, which can diminish the flooring’s lifespan. Additionally, installing the flooring in the direction of the main light source helps camouflage seams and creates a more uniform appearance.
Finishing Touches
Proper finishing touches can significantly enhance the appearance and longevity of your vinyl flooring. Ensure all seams are appropriately sealed and transitions between different flooring types are smooth. Attention to detail during this phase can transform your installation from good to exceptional, adding a professional look that you’ll appreciate for years to come.
Trimming and Edging
For a polished look, focus on trimming and edging around edges and corners. Use a sharp utility knife to achieve clean cuts, allowing the vinyl to align perfectly with walls and baseboards. This precision not only enhances the aesthetics but also prevents dirt accumulation in gaps, ensuring a seamless finish throughout your space.
Cleaning and Maintaining Vinyl Floors
Routine cleaning and maintenance are crucial for preserving your vinyl flooring’s appearance and durability. Regular sweeping or vacuuming helps eliminate dirt and debris, while damp mopping with a gentle cleaner keeps the surface fresh. Avoid harsh chemicals and abrasive tools to prevent damage and maintain the integrity of your flooring.
Establishing a cleaning routine is vital for sustaining your vinyl floors. Consider using a pH-neutral cleaner specifically designed for vinyl, as it effectively removes grime without causing damage. For deeper cleaning, use a mop and warm water biweekly, focusing on high-traffic areas. Additionally, placing mats at entrances can significantly reduce wear. By incorporating these strategies, your floors will maintain their luster and longevity, enjoying a brand-new appearance for years to come.
Common Mistakes to Avoid
Avoiding common mistakes during vinyl flooring installation can significantly affect the outcome. From inaccurate measurements to not adhering to manufacturer guidelines, these errors can lead to costly rework and unsatisfactory results. Paying attention to detail at each step will ensure a more successful installation and provide long-lasting satisfaction.
Misjudging Measurements
Accurate measurements are important for a perfect vinyl flooring installation. When you misjudge measurements, you risk creating gaps or needing additional materials, which can increase costs and extend the project timeline. Always measure twice, factoring in any irregularities in your space, to ensure a precise fit and optimal outcome.
Ignoring Manufacturer Guidelines
Manufacturers provide specific guidelines for vinyl flooring that cover everything from acclimation to installation techniques. When you choose to overlook these instructions, you may face issues such as inadequate adhesive bonding and warranty voids. Following the manufacturer’s recommendations ensures that your flooring performs as intended, maximizing durability and aesthetics.
Ignoring manufacturer guidelines can lead to improper installation methods that compromise the integrity of your floor. For instance, if a manufacturer specifies a certain type of adhesive or requires a specific acclimation period, deviating from these suggestions can result in flooring that bubbles or shifts. Moreover, neglecting these vital instructions often voids warranties, meaning you’ll be responsible for any repairs or replacements. Therefore, always take the time to carefully read and implement any guidelines provided to ensure the best installation practices are followed.
Conclusion
Following this expert advice, you can achieve a flawless vinyl finish in your flooring installation. Prioritize proper subfloor preparation, select high-quality materials, and utilize the right tools for optimal results. Pay attention to acclimation and ensure accurate measurements to prevent future complications. By adhering to these guidelines, you can enhance the durability and appearance of your vinyl floors, ultimately transforming your space into a stunning environment that reflects your style.
