
With the right approach and tools, you can transform your space with vinyl flooring on your own. This comprehensive guide will walk you through the entire installation process, from preparation to finishing touches, ensuring that you achieve professional-looking results. By following these step-by-step instructions tailored for the DIY enthusiast, you’ll gain confidence in your skills and enjoy the satisfaction of completing the project yourself. Let’s look into the vital techniques and tips that will lead you to success in your vinyl flooring installation journey.
Preparing for Installation
While getting ready to lay down your vinyl flooring, proper preparation can significantly impact the success of your project. Start by measuring your space and ensuring the subfloor is clean, dry, and level. This will create the ideal surface for your new flooring, minimizing any potential issues during installation.
Choosing the Right Vinyl Flooring
Flooring options are abundant, and selecting the best vinyl flooring for your needs is vital. Consider factors such as room size, foot traffic, and your personal style. Whether you prefer luxury vinyl planks or sheets, pick a design that aligns with your vision while providing durability and functionality.
Tools and Materials Needed
Above all, having the right tools and materials on hand will streamline your vinyl flooring installation process. Essential items include a utility knife, straightedge, measuring tape, and adhesive—if needed. You’ll also want a roller for proper adhesion and a spacemaker to ensure even gaps for expansion.
Vinyl flooring installation isn’t just about laying down the planks or sheets; it requires some necessary tools and materials to achieve a professional finish. Having a sturdy utility knife will help you make precise cuts, while a measuring tape ensures accurate sizing. A straightedge acts as a guide for cutting straight lines, and a roller helps secure the flooring in place after installation. Additionally, gather any necessary adhesive or underlayment as required by your chosen product. By equipping yourself with these tools, you’ll facilitate a smoother and more effective installation process.
Subfloor Assessment and Preparation
It is vital to assess and prepare your subfloor before installing vinyl flooring to ensure a smooth and long-lasting finish. A solid foundation not only supports your new flooring but also helps prevent future issues such as buckling or damage. Take the time to inspect the condition of the subfloor, clean it thoroughly, and ensure it is leveled to provide the best results for your DIY project.
Inspecting the Subfloor
Among the first steps in your subfloor assessment is inspecting for any signs of damage, such as cracks, rot, or moisture. Checking for uneven surfaces or protruding nails is also important, as these can affect the installation of your vinyl flooring. Inspect thoroughly to identify any areas that require repair or attention before proceeding.
Cleaning and Leveling the Surface
Surface preparation is vital for ensuring proper adhesion and longevity of your vinyl flooring. Before installation, it’s vital to clean and level the subfloor. An unclean or uneven surface can lead to complications, including bubbling and shifting of the vinyl. Take the necessary time to remove dust, debris, and any residue that could interfere with the adhesive or the flooring itself.
Consequently, you’ll need to use a vacuum and damp mop to remove all loose materials and grime from the subfloor. If you spot any low areas, use a leveling compound to create a flat surface. Pay attention to corners and edges, ensuring that no debris is left behind. A properly prepared subfloor will not only enhance the aesthetic appeal of your installation but will also contribute to the overall durability and performance of your vinyl flooring.
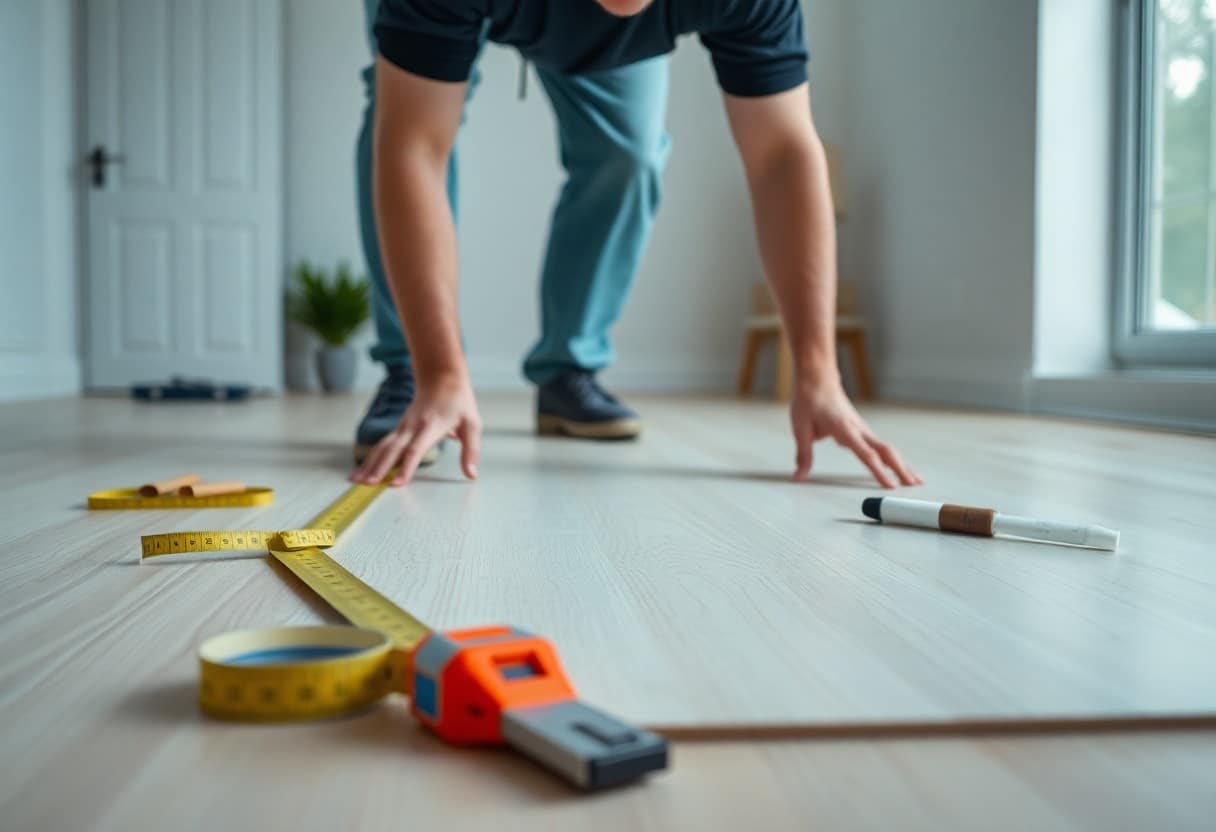
Measurement and Layout
One of the most important steps in your vinyl flooring installation is ensuring accurate measurements and a thoughtful layout. Proper planning in this phase will simplify the installation process and enhance the aesthetic appeal of your finished floor. Take the time to measure accurately and strategize your layout to achieve a professional-looking result.
Measuring the Installation Area
Before you begin, it’s important to measure the installation area meticulously. Use a tape measure to determine the length and width of each section where the new flooring will be laid. Make note of any irregularities, such as alcoves or corners, as these will require special attention when cutting your vinyl planks.
Planning the Floor Layout
Along with accurate measurements, planning the floor layout is vital for a successful installation. Consider the direction of the planks and how they will align with the room’s natural light and existing features. A well-thought-out layout can create a more cohesive and visually appealing floor.
For instance, laying the vinyl planks parallel to the longest wall or the primary light source can enhance the sense of space in the room. It’s also beneficial to stagger the seams of the planks to ensure a seamless look and improve overall stability. Taking the time to refine your layout will lead to a polished outcome that elevates your space.
Installation Methods
After selecting the right vinyl flooring for your project, it’s time to explore the various installation methods available. Each method has its unique benefits and suitability depending on the specific conditions of your space. The two most popular approaches are glue-down installation and click-lock installation, both offering a reliable way to achieve beautiful results while ensuring durability.
Glue-Down Installation
Any vinyl flooring installation that involves applying adhesive to secure the planks directly to the subfloor is referred to as glue-down installation. This method is particularly beneficial for high-traffic areas, as it provides a stable and long-lasting bond. You’ll need to ensure the subfloor is clean and dry before applying the glue for optimal results.
Click-Lock Installation
Any type of vinyl flooring that features interlocking edges allowing for easy assembly without the use of glue or nails is classified as click-lock installation. This approach is great for DIY enthusiasts looking for a quick and efficient way to refresh their space.
Indeed, click-lock installation is an excellent choice for those who prefer a straightforward, mess-free option. The planks simply snap together at the edges, allowing for easy handling and adjustments as you work. This method is particularly favored for floating floors, which means you don’t need to secure it to the subfloor, making it easier to replace in the future or to adjust if floor levels change. Plus, with various styles and finishes available, you can effortlessly achieve the look you desire in your home.
Cutting and Fitting the Vinyl Planks
To achieve a professional-looking vinyl flooring installation, precise cutting and fitting of the planks are important. The right measurements and techniques ensure that your flooring not only looks great but also fits seamlessly in your space. By following the proper procedures, you can effectively tackle corners, edges, and any irregularities in your layout, giving your floors a polished finish.
Techniques for Cutting
To cut your vinyl planks accurately, start by measuring the required size and marking it with a pencil. You can use a utility knife for straight cuts, ensuring to score the plank several times before snapping it along the line. For intricate shapes, a jigsaw or fine-toothed saw will do the trick. Always wear safety gear and work on a stable surface to guarantee clean cuts.
Fitting Around Obstacles
The ability to fit vinyl planks around obstacles, such as pipes or door frames, is important for achieving a seamless installation. You may need to create intricate cuts to ensure that the planks fit securely against these features while maintaining their overall aesthetic appeal.
At times, you will encounter situations where your vinyl planks must adapt to multiple obstacles. Begin by taking precise measurements of the areas to be cut. Use a template or cardboard piece to create a pattern, which can then be transferred to the plank. Always leave a small gap around objects for expansion purposes, and utilize a utility knife or jigsaw to carefully trim the edges. This attention to detail will help create a professional finish and maintain the integrity of your flooring installation.
Finishing Touches
All your efforts during the installation process culminate in the finishing touches that enhance the overall aesthetic of your new floor. These last details not only complete the look but also provide protection and cohesion to your space. Whether you’re adding baseboards, trim, or care and maintenance tips, taking the time to perfect the finishing touches will elevate your vinyl flooring project to beautiful completion.
Installing Baseboards and Trim
After installing your vinyl flooring, it’s time to add baseboards and trim to give your room a polished finish. Measure the perimeter of your room accurately and cut your baseboards accordingly. Use a nail gun or adhesive to secure the trim in place, ensuring it fits snugly against the wall and floor without any gaps. This not only hides the edges of the vinyl but also adds a decorative element that ties the room together.
Care and Maintenance Tips
Touches that ensure longevity and aesthetics for your vinyl flooring are imperative. Regular cleaning will keep your floors looking new. Here are some tips to maintain your vinyl:
- Use a microfiber mop to clean daily and remove dust.
- Avoid abrasive cleaners that can damage the surface.
- Implement area rugs in high-traffic zones for added protection.
- Immediately wipe up spills to prevent stains or damage.
Perceiving and maintaining your vinyl flooring will not only enhance its appearance but will also extend its lifespan.
At the heart of effective care and maintenance for your vinyl floors is consistency. Regular maintenance ensures that your flooring remains beautiful and functional over time. Here are some additional tips to keep your vinyl in top condition:
- Use furniture pads to prevent scratches when moving items.
- Keep humidity levels in check, as excessive moisture can warp the material.
- Conduct periodic inspections for any signs of wear and tear and address them promptly.
- Consider professional cleaning every few years to restore the shine.
Perceiving these maintenance practices allows you to enjoy the durability and beauty of your vinyl flooring for many years ahead.
Final Words
So, with your newfound knowledge from this guide on Step-By-Step Vinyl Flooring Installation, you are equipped to tackle your DIY project with confidence. Each step you take, from preparation to finishing touches, will ensure a successful transformation of your space. Trust in your abilities, follow the structured approach, and don’t hesitate to seek help if needed. Enjoy the process and take pride in creating a beautiful, durable floor that reflects your personal style.
