
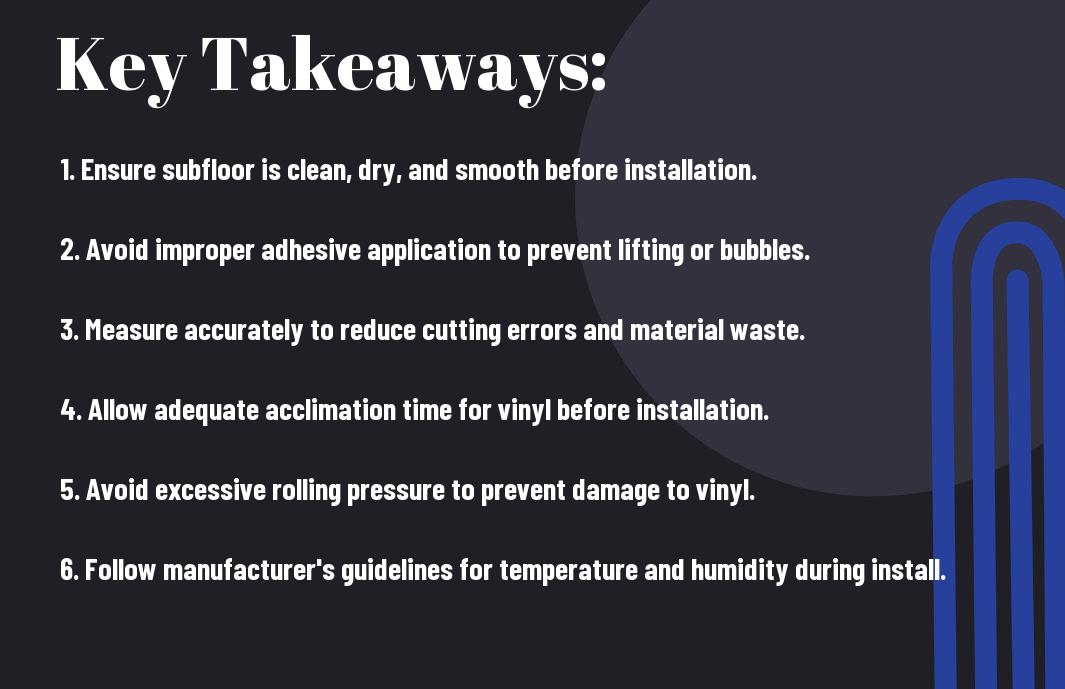
Over time, improperly installed dry back vinyl flooring can lead to frustrating issues, compromising both appearance and durability. To ensure a successful installation, you must be aware of common pitfalls that can arise during the process. By understanding these mistakes and how to avoid them, you can achieve a flawless finish that enhances your space. Let’s probe into the key errors to steer clear of while installing your vinyl flooring, ensuring your project is both efficient and long-lasting.
The Preparation Pitfall: Skipping Subfloor Checks
Neglecting to inspect your subfloor before installation can drastically affect the longevity and appearance of your dry back vinyl flooring. A thorough examination ensures that you address any underlying issues, proactively preventing unnecessary complications down the road. Investing time in this preliminary step now will save you from costly repairs or replacements in the future.
Importance of a Level Subfloor
A level subfloor is important for a successful vinyl flooring installation. An uneven surface can lead to buckling, warping, and other defects that compromise the integrity of your flooring. Ideally, your subfloor should not deviate more than 1/8 inch over a 10-foot span to maintain a smooth and uniform finish. If you notice significant unevenness, self-leveling compounds are an effective remedy.
Recognizing Moisture Issues
Moisture beneath the subfloor can lead to disastrous outcomes for vinyl flooring, including mold growth and adhesive failure. Assessing the moisture levels using a moisture meter or conducting a simple plastic sheet test can help you identify hidden problems. Understanding the environment and taking preventive measures will reinforce the floor’s resistance to moisture damage.
If you discover excessive moisture in your subfloor, it’s vital to address it immediately before installation. High humidity levels or leaks can result in trapped moisture, which not only impacts adhesive performance but also negatively affects the flooring material itself. Simple fixes such as installing a vapor barrier, using dehumidifiers, or improving ventilation can help in mitigating these moisture issues. By taking these precautions, you ensure a more stable and lasting floor that can withstand everyday wear and tear.
Choosing the Wrong Adhesives: A Recipe for Disaster
Adhesives play a pivotal role in the longevity and performance of dry back vinyl flooring. Selecting the wrong type can lead to peeling, buckling, and even complete failure of your flooring installation. You risk compromising not just the aesthetic qualities but also the functionality and durability of your flooring, ultimately resulting in costly repairs or replacements.
Different Adhesive Types and Their Uses
Different adhesives serve specific purposes, and understanding these distinctions can prevent mishaps.
| Adhesive Type | Use Case |
| Pressure-sensitive adhesive | For temporary installations or areas with light foot traffic. |
| Water-based adhesive | Recommended for moisture-prone areas; low VOC emissions. |
| Solvent-based adhesive | Ideal for high-traffic areas needing strong bonding. |
| Polyurethane adhesive | Best for extreme temperature variations. |
| Modified silicone | Works well in wet areas, such as bathrooms or kitchens. |
After understanding adhesive types, choose one that aligns with your specific flooring requirements.
Consequences of Incorrect Adhesive Selection
Using the wrong adhesive can lead to severe repercussions long after the installation is complete. Flooring can lift, the seams can loosen, and discoloration may occur, ruining the aesthetic appeal. Plus, you might find yourself dealing with mold growth in moisture-affected areas.
Consider the long-term impact of adhesive mistakes. For instance, if you use a pressure-sensitive adhesive in a high-traffic area, the flooring may begin to separate within months. Homeowners often underestimate the environmental conditions like humidity, which can further exacerbate issues. Moreover, incorrect adhesive selections can void the warranty on your flooring product, causing you to incur greater costs for repairs or replacements. Prioritizing the right adhesive not only preserves your investment but also ensures a hassle-free flooring experience.
Neglecting Acclimation: The Danger of Temperature Extremes
Ignoring the acclimation process can lead to a host of installation issues that impact the performance of your dry back vinyl flooring. Proper acclimation allows the flooring material to adjust to the temperature and humidity of your environment, which is vital to prevent warping, buckling, or gapping after installation. Without this preparation, you might find your once-perfect installation marred by unsightly flaws due to environmental extremes.
| Temperature Range for Acclimation | 65°F to 85°F |
| Acclimation Duration | 48-72 hours |
| Ideal Humidity Level | 30% to 50% |
How Vinyl Float Tolerance Affects Installation
Vinyl flooring has a defined tolerance for floating, which can impact how it responds to changes in room temperature. If your installation area experiences significant fluctuations, the floor could expand or contract beyond its intended limits, leading to problems such as bulging or gaps. Ensuring that you have adequate spacers in place to accommodate these movements will help maintain the floor’s integrity throughout its life.
The Impact of Humidity on Expansion and Contraction
Humidity plays a significant role in how vinyl flooring reacts over time. High levels of moisture can cause the planks to swell, whereas low humidity can lead to shrinkage. Such changes can create an uneven surface, shifting seams, and even permanent damage if not properly accounted for during installation.
In areas with significant humidity variations, like bathrooms or kitchens, installing vinyl flooring without sufficient expansion gaps invites trouble. Experts recommend maintaining at least 1/4-inch of space around the perimeter to allow for natural expansion and contraction. As a rule of thumb, keeping your indoor humidity levels consistently between 30% and 50% will help manage these fluctuations effectively, extending the lifespan of your flooring and keeping it looking beautiful.
Improper Cutting Techniques: Precision Matters
Precision in cutting vinyl flooring is critical for a flawless installation. Many homeowners underestimate the importance of accurate measurements and cuts, often leading to gaps and misalignments. Cutting mistakes can disrupt the entire look of your flooring and create challenges in the long run, affecting both aesthetics and durability. Investing time in mastering proper cutting techniques pays off significantly when you see how neatly your installed flooring fits together.
Tools for Accurate Cutting
Using the right tools for cutting dry back vinyl flooring enhances both accuracy and efficiency. A sharp utility knife is vital for clean cuts, while a straight edge serves as a reliable guide. Additionally, a cutting mat protects your subfloor and ensures a smooth cutting surface. For larger jobs, consider utilizing a vinyl tile cutter or a circular saw equipped with a fine tooth blade, which can handle larger sheets with precision.
Common Cutting Mistakes That Compromise Installation
Cuts that are too shallow or uneven can create gaps that detract from the visual appearance of your floor. Miscalculating measurements is another common error that often leads to wasted material and increased costs. Additionally, failing to account for expansion spaces can affect the overall fit of the planks. Addressing these mistakes during the cutting phase is paramount to achieving a successful installation.
For instance, cutting too aggressively can cause your flooring to chip or crack, leading to unsightly damage. If you find yourself using a utility knife on a surface that isn’t level, the risk of uneven cuts increases significantly. Rushing through the measurements often results in miscalculated lengths, compelling you to make hasty corrective cuts later. Each of these mistakes diminishes the integrity of your installation and complicates the process, emphasizing the necessity for careful attention to cutting details from the start.
Installation Order Blunders: Getting the Sequence Wrong
Mismanaging the installation sequence can lead to unnecessary challenges and a less-than-flawless finish. Start from one corner of the room and work your way outward, ensuring that each plank or tile locks together seamlessly. Pay attention to adjacent rooms and ensure that transitions are handled smoothly to maintain a cohesive look. By following a logical order, you minimize temporary disturbances to the newly laid flooring.
Steps to Follow for Optimal Results
Begin by preparing your space; clear furniture and debris, allowing for easy access. Next, lay your underlayment if needed, followed by the first row of planks or tiles along the wall. Proceed methodically, ensuring that each piece is aligned and fitted snugly before moving on. Maintaining this flow helps to prevent mistakes and maintain the aesthetic quality of the installation.
Common Order Mistakes and Their Ramifications
Failing to follow the correct sequence can lead to alignment issues, uneven surfaces, and even extra waste. For instance, jumping ahead to a different area may create gaps or leave irregular spaces that are difficult to fill later. Additionally, improper installation order can inadvertently damage your flooring, requiring costly repairs down the road.
Common order mistakes tend to stem from a rushed approach or a lack of planning. For example, starting in multiple corners instead of a single point can cause alignment errors that may not be immediately visible but can lead to significant issues later on. You might end up with uneven edges or misaligned transitions, resulting in a cluttered look. These issues often require tearing up sections of the flooring to fix, which is both time-consuming and frustrating. By adhering closely to a structured installation order, you can avoid these pitfalls and ensure a beautiful, polished final result.
Final Words
Upon reflecting on the installation of dry back vinyl flooring, it’s necessary to acknowledge common pitfalls that can undermine your efforts. By ensuring proper surface preparation, maintaining the right conditions during installation, and following manufacturer guidelines closely, you can avoid costly mistakes. Pay attention to alignment and adhesive application, as these factors significantly influence the longevity and aesthetic of your flooring. With careful planning and execution, your vinyl flooring can achieve a professional look that enhances your space.
