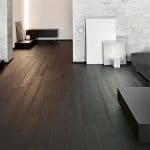
It’s common with homeowners to look for only heartwood face in walnut lumber and few approve of sapwood. However, sapwood is a natural occurrence in walnut wood, it isn’t a defect. But when it comes to woodworking, it’s not considered ideal for furniture and flooring.
What are Sapwood and Heartwood?
Sapwood is the living, outer layer of the stem/branch of walnut wood just under the bark and cambium. It’s lighter in colour and the vital medium which carries water and sap in a living tree. It isn’t a good stock for woodworking as it contains a lot of moisture. It’s vulnerable to fungus and shrinks when dried.
Heartwood is the dead, inner layer that forms the major part of the stem’s cross section. It’s darker in colour and contains considerably less moisture and shrinks less than sapwood.
How to Deal with Sapwood
You’re likely to find a few streaks of sapwood even in walnut wood boards even at the showrooms of reputed lumber suppliers and manufacturers. Thankfully, you don’t need to discard sapwood entirely from your walnut lumber. Although it may not look as beautiful as heartwood and isn’t as durable, it can be treated and used for your flooring purpose. Below are some ways to deal with sapwood.
- Cut Off Sapwood
A piece of lumber has two sides – a face and a back. Only one side is displayed in your final product. You can cut off the sapwood part completely and work only with the heartwood if you can afford the wastage.
- Hide Sapwood with Dyes
Dyes will help you achieve an evenly coloured project while hiding the lighter sapwood.
There are several dyes available in the market. Dyes don’t conceal the appearance of the beautiful grain patterns of walnut like stains.
They’re either water-soluble or alcohol-soluble. However, water-soluble dyes are more resistant to fading than alcohol-soluble dyes. They’re also easier to apply on the wood and don’t leave lap marks.
Follow the steps below to apply dye on the wood piece and hide the sapwood.
- Select a dye colour of your choice. To keep the look natural, choose a dye colour that closely matches the colour of the heartwood. The dye should be UV resistant.
- If it’s a water-soluble dye, dilute it with water and if it’s an alcohol-soluble dye, dilute with denatured alcohol by 50%.
- Apply the diluted dye in 2-3 coats on both the heartwood and sapwood of your wood piece.
- Use a thin coat of shellac and seal the wood.
- When the sealer is dry, sand it lightly with 180-220 grit sandpaper.
- Apply a light coat of an oil-based stain gel on the top of the sealer. Ensure that the pores get pigmented without giving too much pressure when applying the gel.
- Complete the process by applying lacquer, varnish or any other finish of your choice.
Some More Tips
- Before applying the water-soluble dye, wet the wood and dry it first. After the wood dries, sand it with 180-220 grit sandpaper to sand off the raised grain and then apply the dye.
- Always test the dye on a few test pieces before applying it on your final product. Test with different dilutions to get your desired colour on the wood.
- After you apply the dye, let it dry overnight before you apply the sealer.
- To get a richer colour on the wood, apply a thin coat of glaze with a rag or a brush before you apply the finish.
- Let the glaze dry completely before you apply the coats of finish.
Walnut lumber with 100% heartwood aren’t widely available and they’re very expensive. If you want to keep a balance between look, quality and costs, you just need to know the tricks mentioned above to make your project look flawless! If you think it’s too much of a job for you, call in the help of a professional hardwood installer.

